PolyScope Programming Examples
Simple Pick and Place Example
A simple Pick and Place program can be created with PolyScope using the VIM-303 Visual Pick programming node. This program assumes a Brick is trained as a depth object and is located on a surface 950mm below the camera when moved to a waypoint called PickZone.
-
Choose the Programming menu (Figure 62).
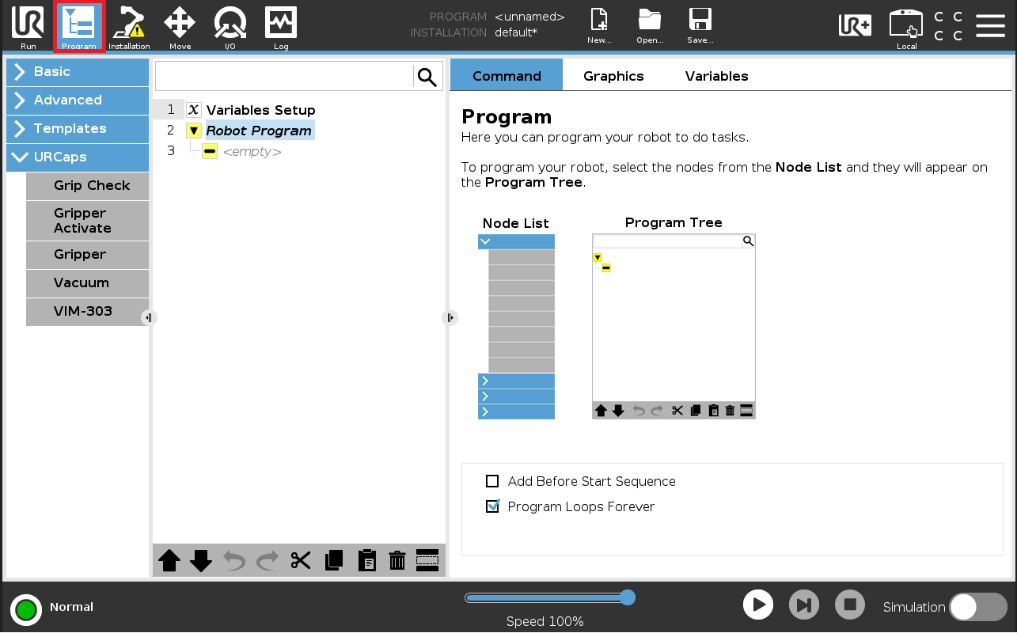
Figure 62: Programming Menu
-
Select a Move from the Basic menu and name the Waypoint PickZone. Set the waypoint to be aimed about 950mm from the front of the camera to the floor (the surface the brick is sitting on) and aimed straight down (camera window parallel to floor) toward a brick (Figure 63).
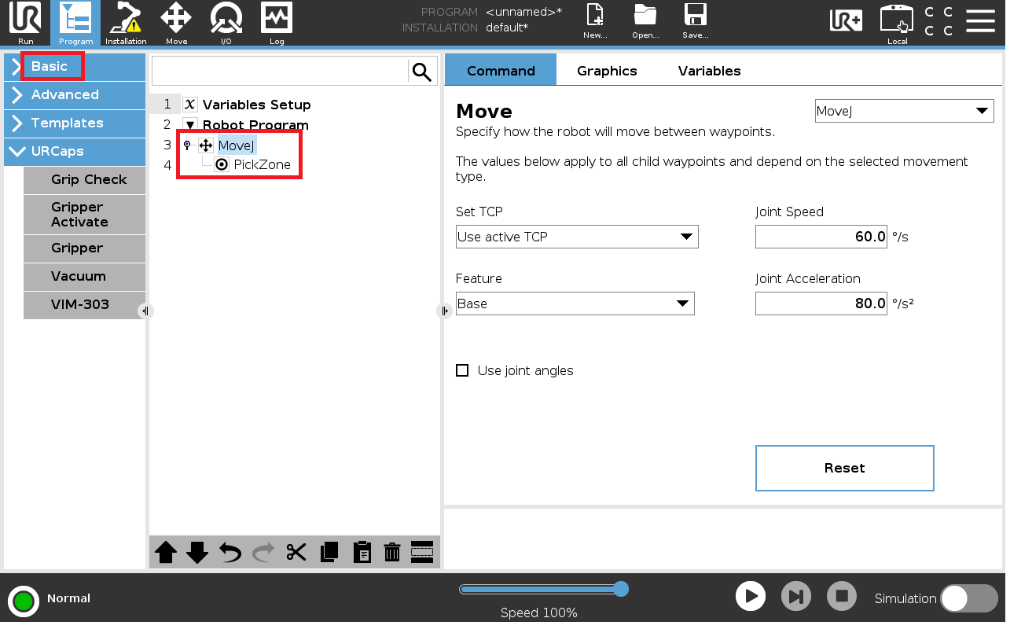
Figure 63: Move to PickZone
-
Select Pick from the VIM-303 menu in the URCaps left menu bar to place the Visual Pick node for visually picking an object (Figure 64). The diagram on the right indicates what this block will do when the program is executed. First, the camera will locate the object, sitting above a particular surface depth. Then it will move the end effector to contact the object and engage the gripper. Then it moves up by a programmable “retract distance”. Objects to be picked could be stacked or moving, depending on how the node is configured.
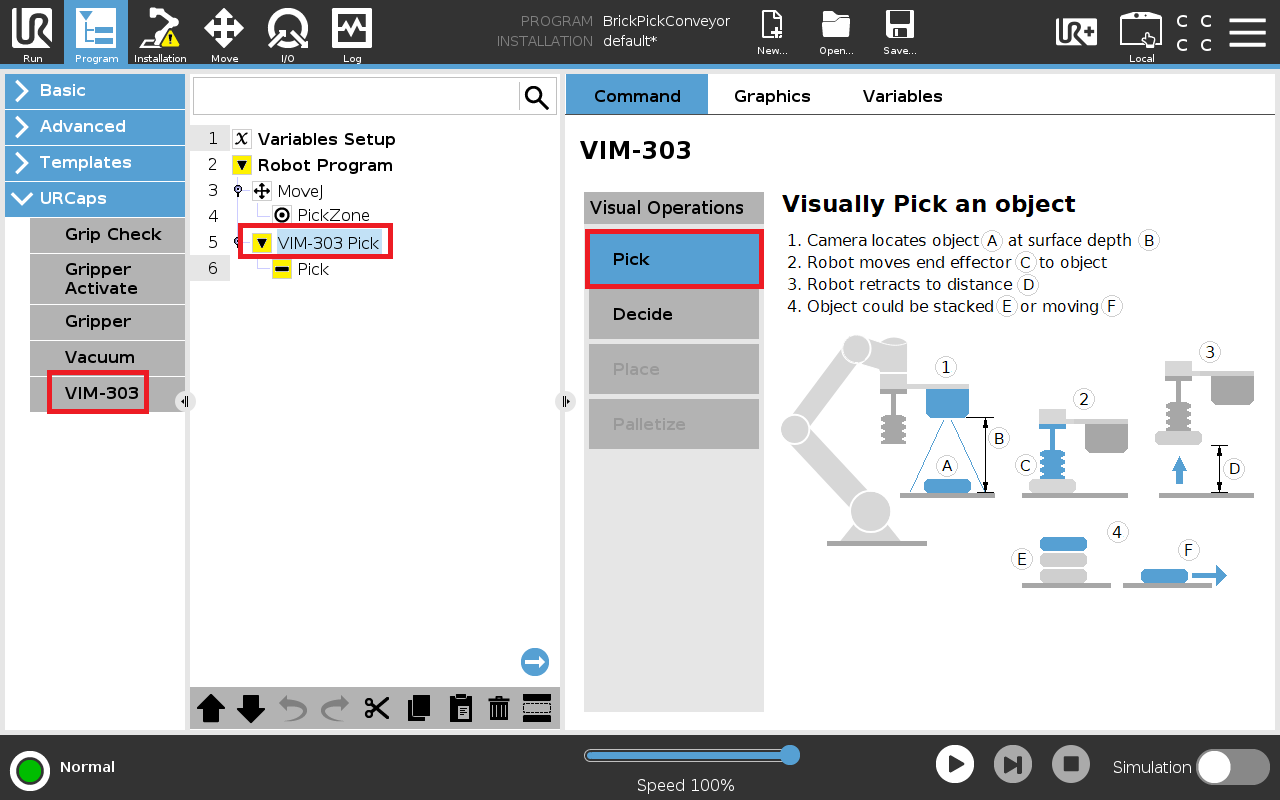
Figure 64: Visual Pick
-
Configure the visual pick (Figure 65). Initially, the block is yellow, indicating that some parameters need to be set, such as what object to pick.
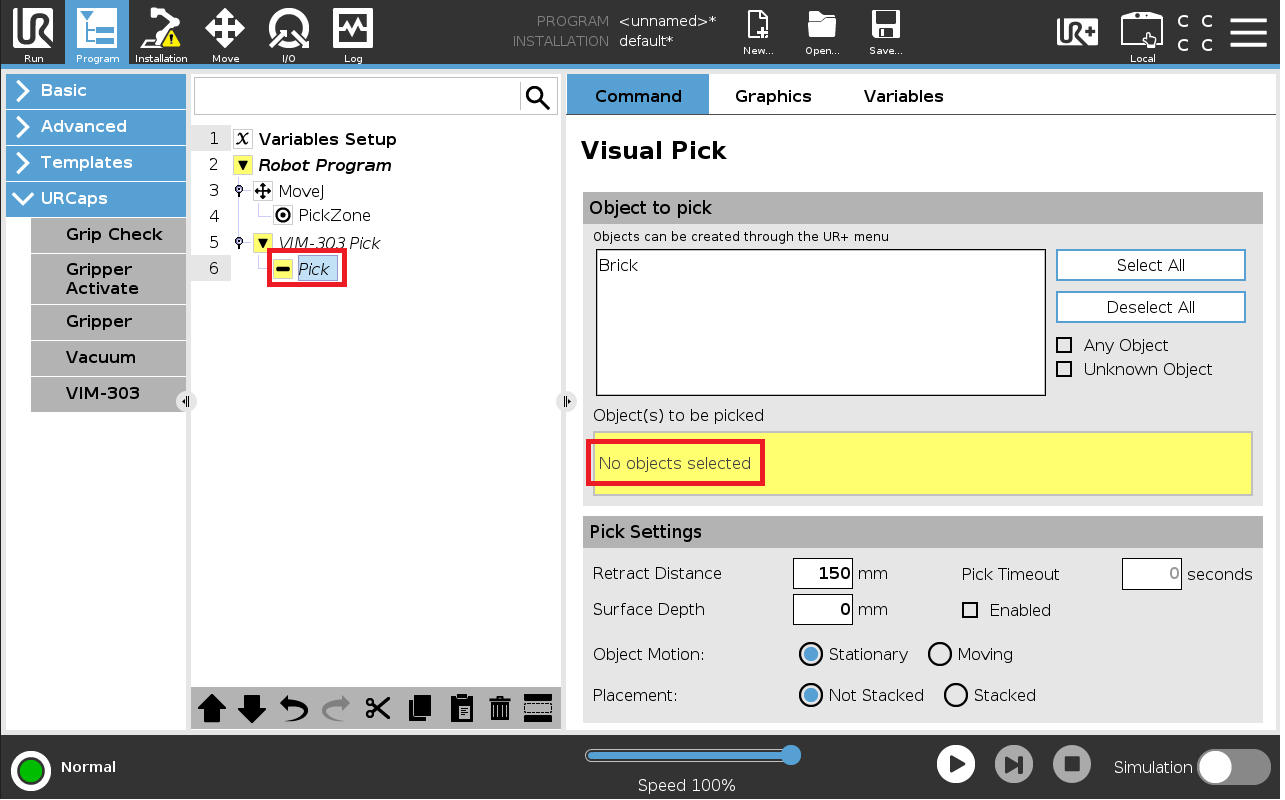
Figure 65: Configure visual pick block
-
Choose the type of object to pick (Brick). Choose the retract distance (see step 3 for a visual representation of what this means). Choose the surface depth (this is the distance between the front of the camera and the surface the brick is sitting on: 950mm). Choose that the object is Stationary (it is not on a conveyor belt, for example). Choose Stacked to indicate that multiple bricks could be stacked on each other, so the camera should only care about the length and width of the object and not be concerned about its measured height from the surface. Once all these entries are made, the node is no longer yellow, indicating it has been properly configured (Figure 66).
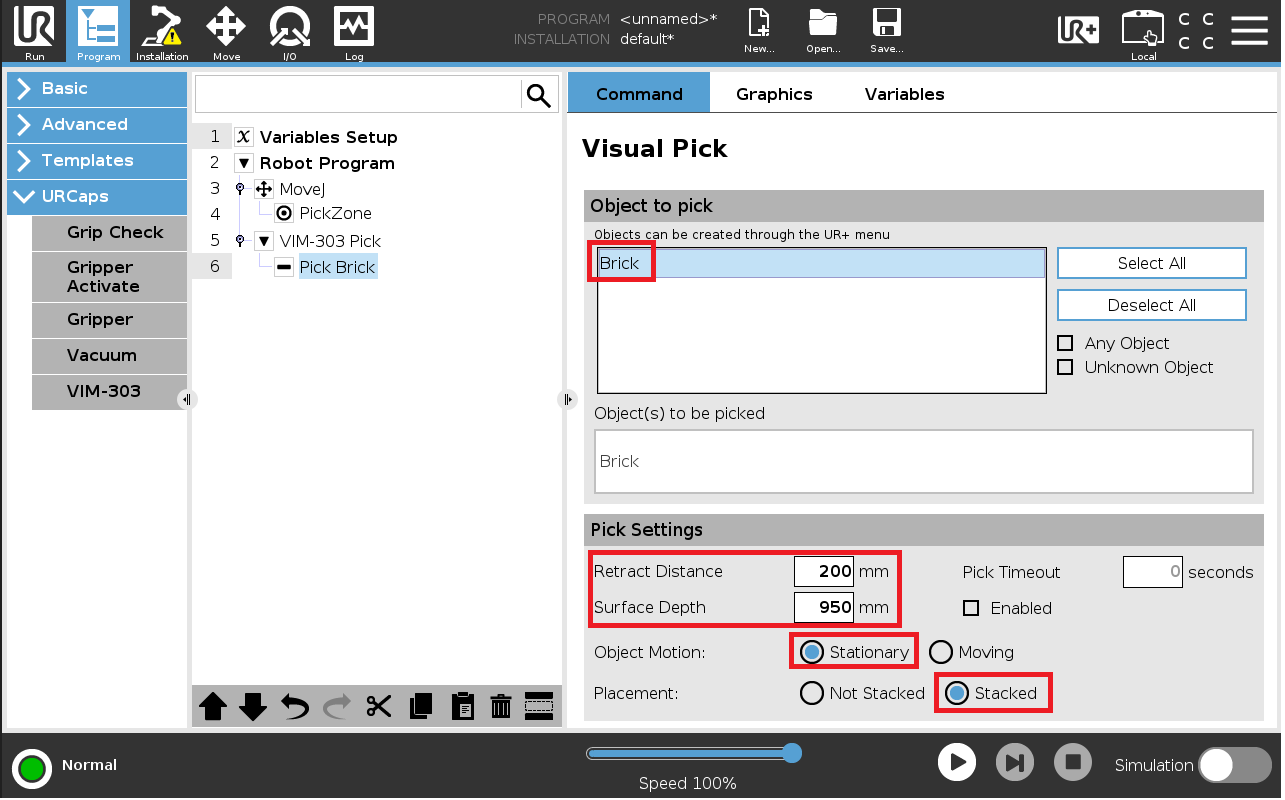
Figure 66: Configured visual pick block
-
Create a Move node and specify a waypoint named PlaceZone. Add a Set node to turn off the gripper to release the brick. Then add a Move node to go back to the PickZone (Figure 67).
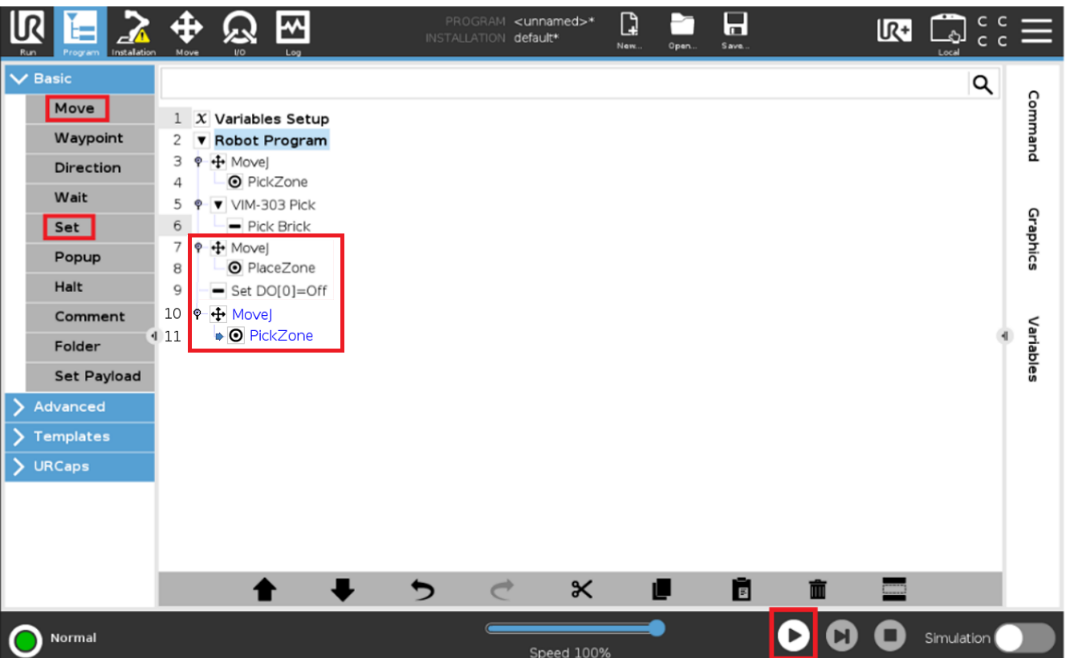
Figure 67: Nodes for placement
-
Run the program by pressing the Play button (bottom of Figure 67). The robot should move to the PickZone. The camera should identify the brick and then move the robot to pick it up, by actuating the gripper. The robot will then move to the PlaceZone and release the gripper and then move to the PickZone.
More Realistic Pick and Place Example
Figure 68 shows a more realistic but more complex programming example. It demonstrates the use of native PolyScope nodes (Move, Set, Loop), the VIM-303 Visual Pick node, and Script nodes that allow various parameters of the camera to be set or read.
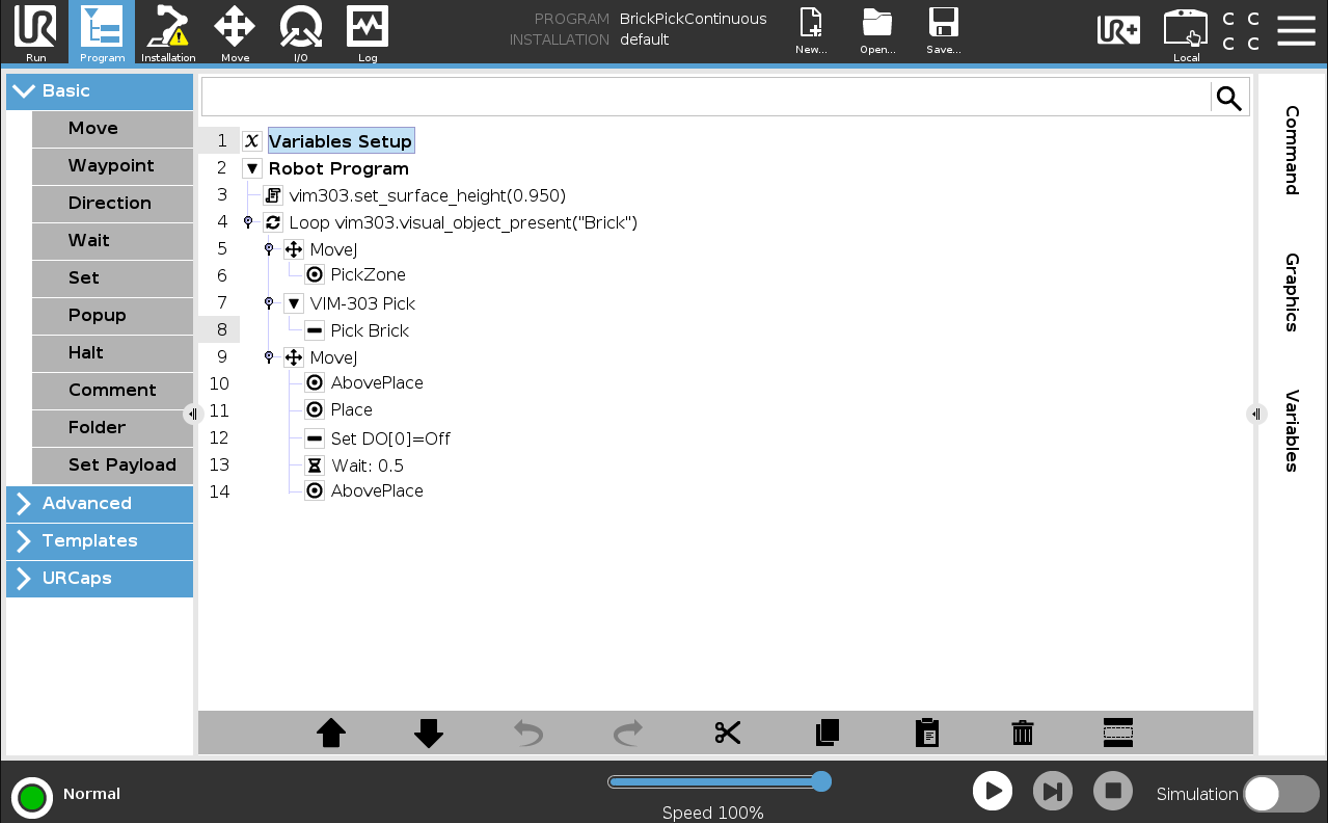
Figure 68: Pick until there are no more bricks
The program is explained here by line number in the PolyScope program:
- Use the script node to set the camera’s surface height. This sets the surface height for the first time “visual_object_present” is called in line 4 to 950mm. Subsequent calls will use the value of surface height from the last visual pick from line 8.
- Loop while there are bricks present. This uses a script argument to the loop node that asks the camera if there are any objects (Bricks) within the ROI of the camera.
- Joint move
- To PickZone
- Perform a visual pick
- Configure the visual pick (using the same parameters as the previous example, Figure 58).
- Move to (multiple steps to perform the placement)
- AbovePlace is just above where you want to place the brick
- Place is where you will place the brick
- Turn gripper off
- Wait for air to release the brick
- AbovePlace retracts from the placement position
When the camera doesn’t see any more bricks at step 4, the program stops.
Conveyor Picking Example
Figure 69 shows an example of how to pick bricks from a conveyor. The program is the same as the one in Figure 61, except for the configuration of the Visual Pick node to pick the brick in line 6. Object Motion is set to Moving instead of Stationary. It is not expected that bricks would be stacked upon one another on a conveyor, so Placement is set to Not Stacked. The Surface Depth is set to the distance from the surface of the conveyor to the front of the camera when at the PickZone, which is 650mm in this example. When the program is executed, the robot will move to the PickZone and the camera will be watching for a Brick to appear within its field of view. It will direct the robot to track the brick along the conveyor and then pick up the brick. At step 7 and following, the brick is placed on the conveyor.
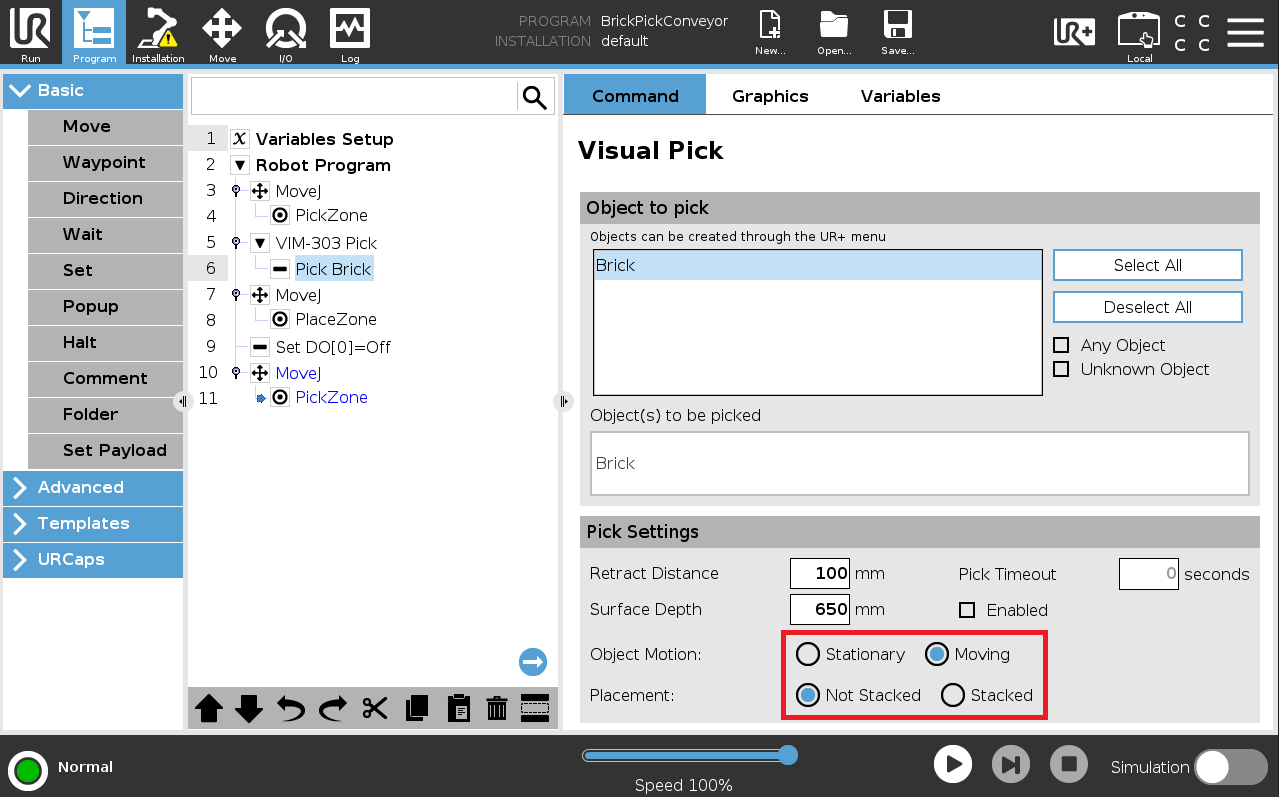
Figure 69: Conveyor Picking Program