PolyScope Program Nodes
VIM-303 Program Nodes
You can add VIM-303 PolyScope program nodes to your program by selecting URCaps from the menu and VIM-303 from the submenu. A node is placed in the program (Figure 53). Select the type of visual operation you wish to use from the tabs in the Command window on the right: Pick or Decide.
The following pages describe these two program nodes in detail.
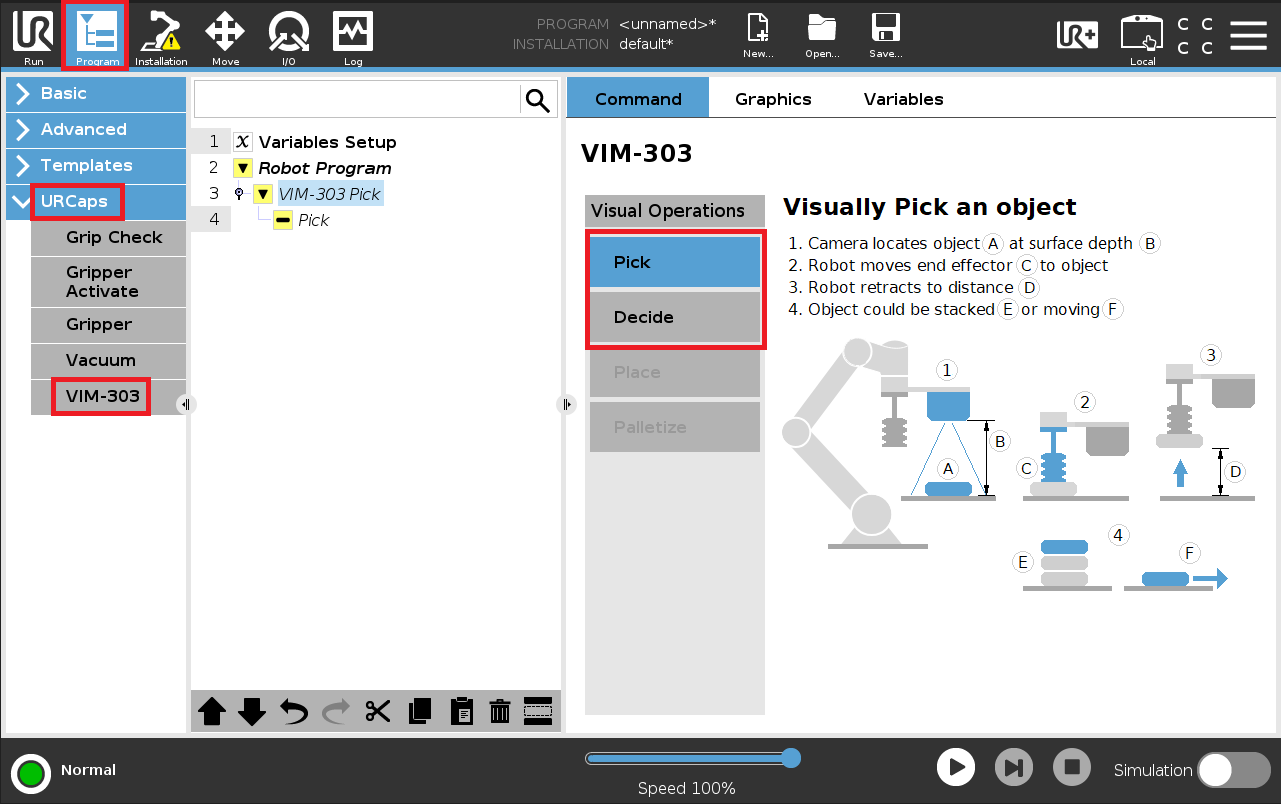
Figure 53: Choosing VIM-303 Program Nodes
Visual Pick
The Visual Pick node (Figure 54) allows the camera to control the robot in order to visually pick an object. Before the Visual Pick node is executed, the robot should be moved to a location where the camera can see the object, typically called the Pick Zone.
Referring to the diagram on the right side of Figure 54, the Visual Pick node will ① locate an object A sitting on a surface at depth B from the front of the camera. The camera directs the robot to place the gripper above the object ② by a programmable Retract Distance. It then moves the gripper to contact the top of the object before actuating the gripper to grab the object. The robot then retracts ③ by the same Retract Distance. The object could be stacked on other objects E or could be moving F.
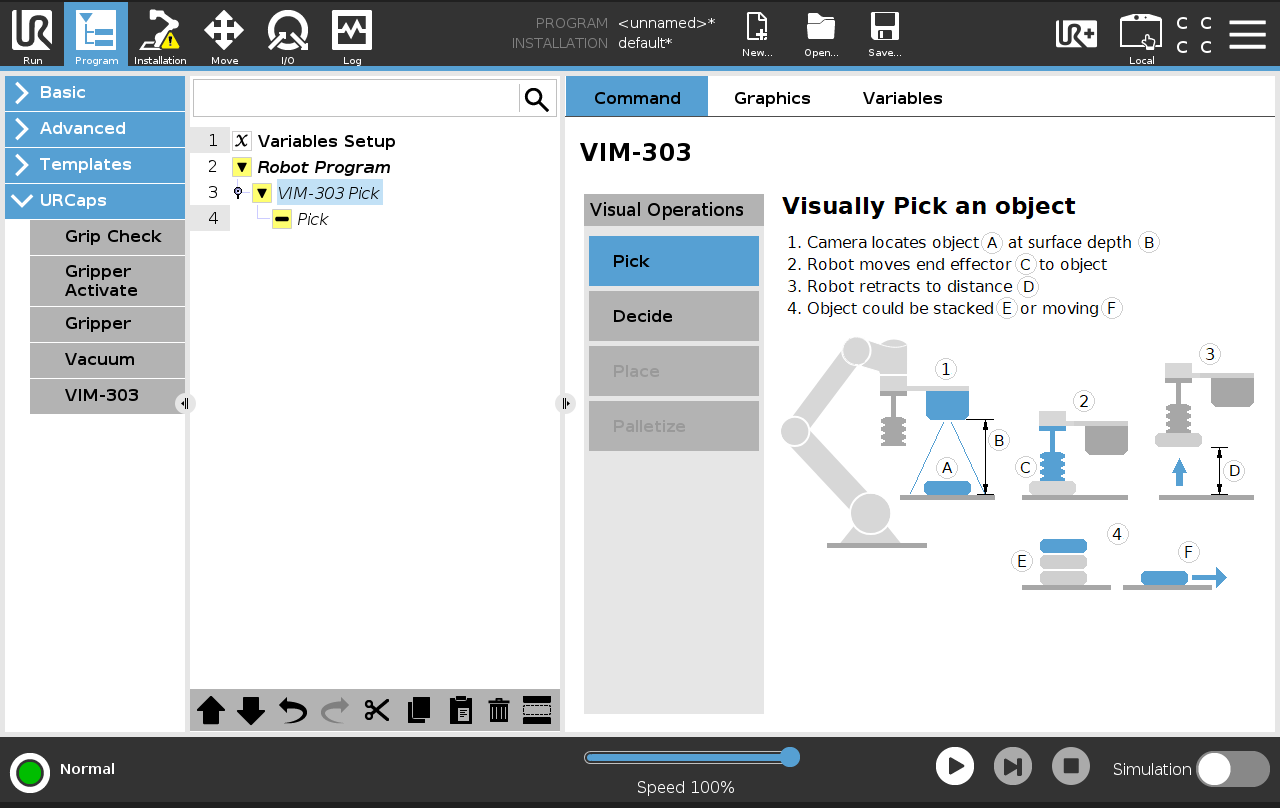
Figure 54: Visual Pick
The Visual Pick node is configured from its child node (Figure 55).
The Object to Pick card allows the user to specify what object(s) the camera will locate and pick. A single type of object or multiple types of trained objects can be selected by clicking them in the list. The Select All button chooses all trained objects. Check Any Object to pick depth finder detected objects even if unknown (not trained). Check Unknown Object to pick only objects that are not currently trained using the depth finder. The object selection is described in the Object(s) to be picked box and in the title of the child node in the PolyScope program.
The Pick Settings card allows other parameters of the Visual Picking to be specified. Note that some depth finder-related options will be grayed out if no depth trained objects or depth settings are included in your selection.
The Retract Distance is programmed in millimeters to set the offset before contacting the object and after picking it up. The Surface Depth is specified in millimeters and indicates the distance from the surface the objects are sitting on to the front of the camera – this relates only to depth trained objects. The Object Motion radio buttons allow the user to indicate whether the object is expected to be moving. If the object is moving, the camera will direct the robot to match the object’s velocity from its visual observations and then descend to pick up the object. The Placement radio buttons allow the user to indicate whether the objects could be in a stacked configuration. If so, then only the lateral dimensions (length and width) are used to determine the identity of the object, as the height from the top of the object to the surface may be different than the height of the object, because the object could be stacked on another object. Lastly, the Pick Timeout can be enabled and then set to indicate the maximum amount of time that the camera should look for an object before giving up. If this is not checked, the camera will continue to wait until a matching object is seen or until the program is stopped by the user.
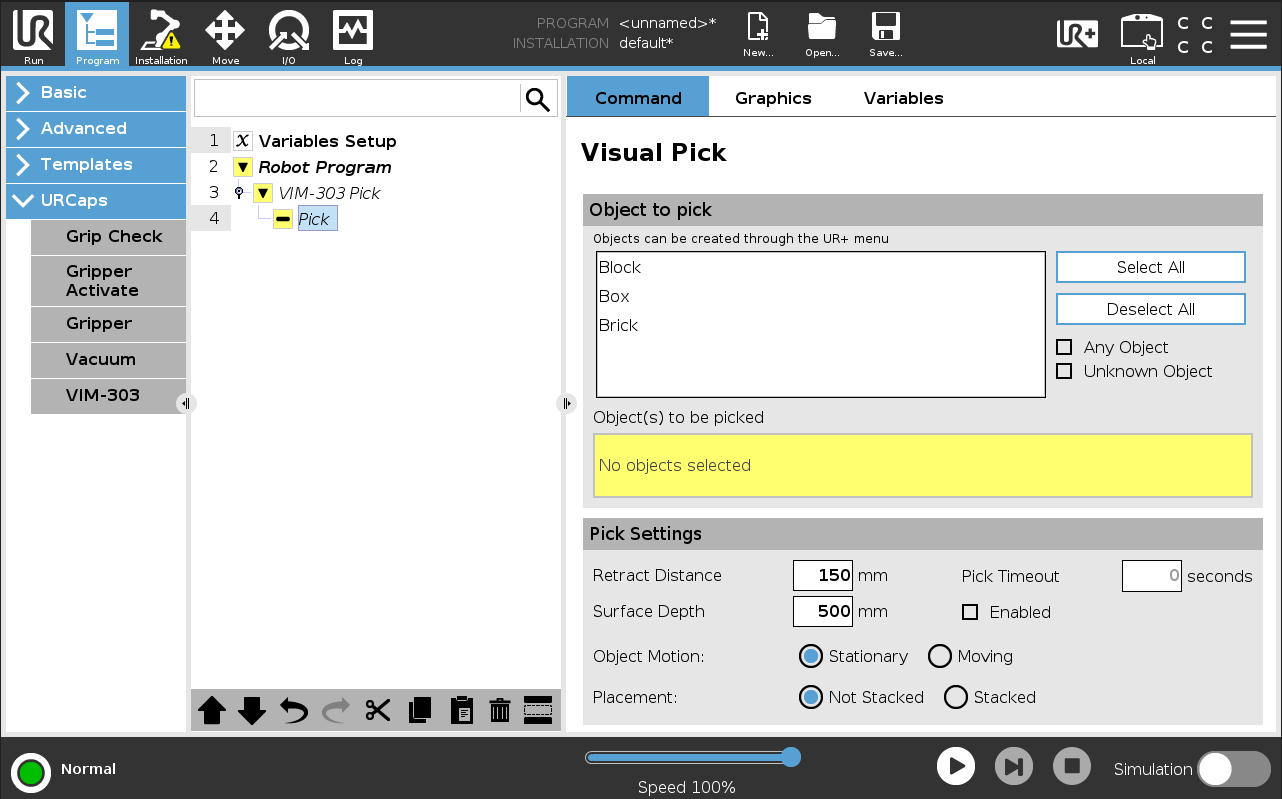
Figure 55: Configuring Visual Pick
Visual Decide
The Visual Decide node (Figure 56) provides a convenient way to check for various visual conditions in the PolyScope program. It is often used for Visual Sorting
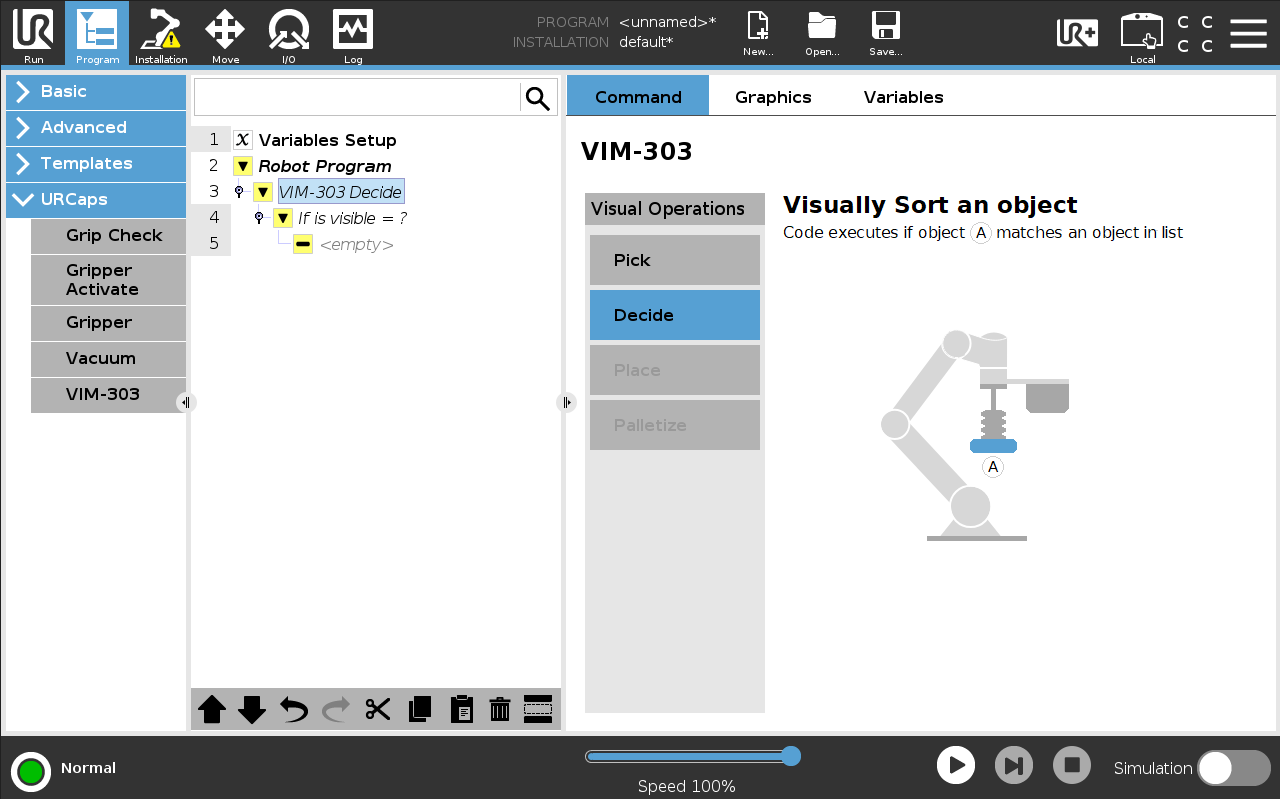
Figure 56: Visual Decide
The different modes of operation of the Visual Decide node are selected from the child node, which starts showing the text “If is visible = ?”. Click this node to choose one of the four conditions that this node supports, as follows (Figure 57):
- If visible object(s) match object(s) below - is an object visible?
- If object currently picked match object(s) below – what object was picked?
- If pick status match object(s) below - what was the last pick status?
- If number of visible depth objects match object(s) below – how many depth objects are visible?
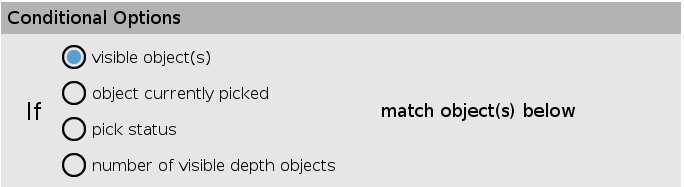
Figure 57: Visual Decide conditional options
Decide Node Object Selection
The first two conditional options of the Decide node (If visible object(s) and If object currently picked) use the same object selection method. The object(s) selection is indicated in the Select Object card (Figure 58 and Figure 59), which shows all available objects. Individual trained objects or groups of trained objects can be selected. Press Select All to select all trained objects. Check Any Object to select depth finder detected objects even if unknown (not trained). Check Unknown Object to pick only objects that are not currently trained using the depth finder. The object selection is described in the Selected object(s) box.
If visible object(s)
Figure 58 shows the first mode of operation of the Visual Decide node. It allows an action to be performed if a particular object or part of a selection of objects is currently visible to the camera. Make a selection in the Select Object card as described above. The title of the child node in the PolyScope program will show “If is visible = “ with your selection.
When the condition is met, the Decide node executes its child node’s action, which is initially labeled <empty> until a child node or
nodes are added.
This mode of the Visual Decide node can be used for determining if an object is present, potentially as part of a wait loop or for ending a loop when there are no more objects.
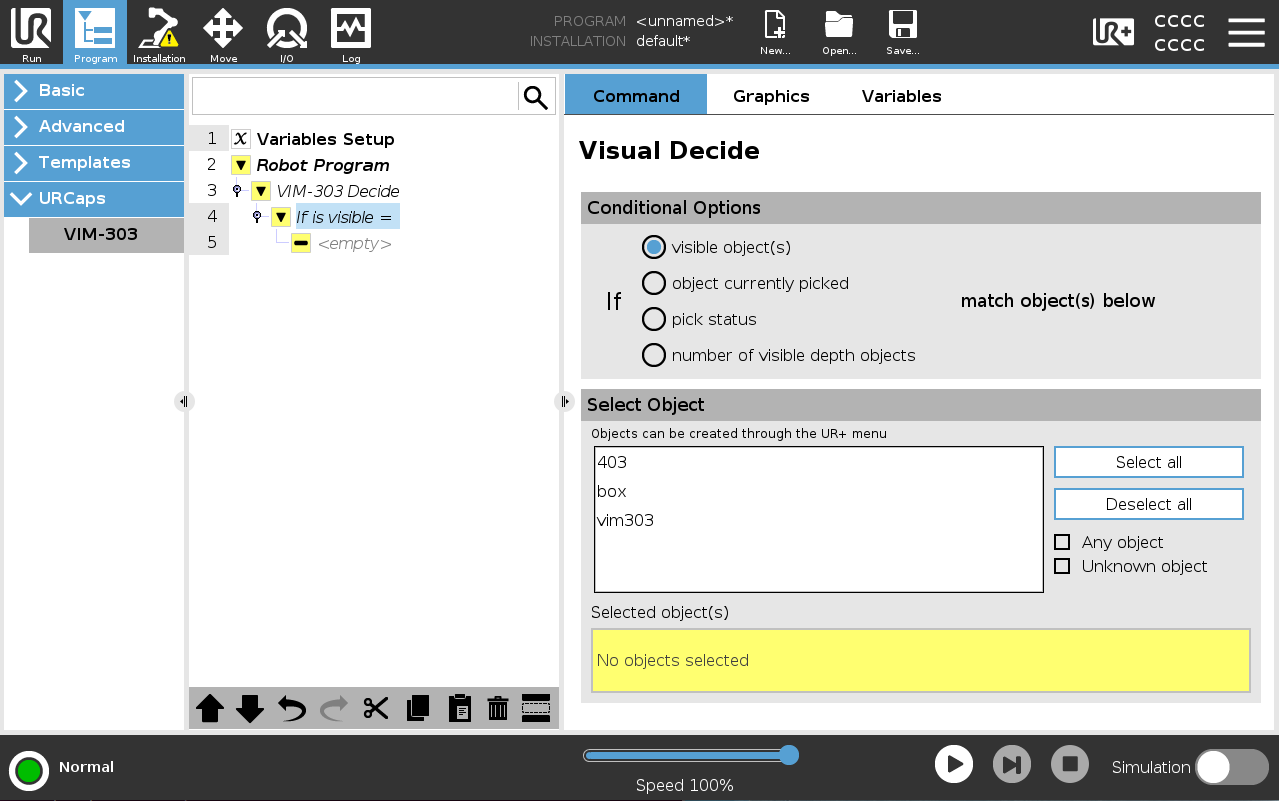
Figure 58: Is an Object Visible?
Object currently picked
Figure 59 shows the second mode of operation of the Visual Decide node. It allows an action to be performed if the last object picked matches a selection of object(s). Make a selection in the Select Object card as described above. The title of the child node in the PolyScope program will show “If picked object = ...” with your selection.
When the condition is met, the Decide node executes its child node’s action, which is initially labeled <empty> until a child node
or nodes are added.
This mode of the Visual Decide node can be used for visual sorting.
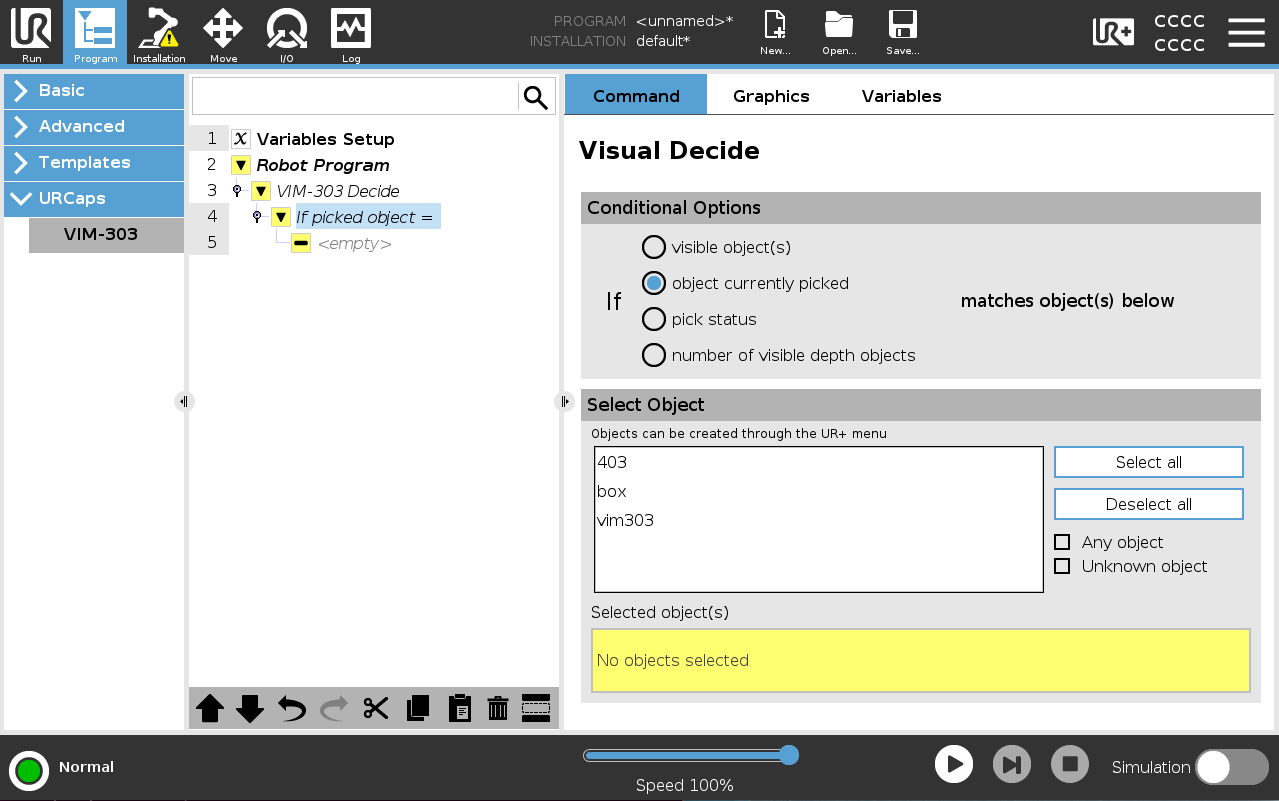
Figure 59: What object was picked?
What was the last pick status
Figure 60 shows the third mode of operation of the Visual Decide node. It allows different actions based on the outcome of a Visual Pick.
The normal result from a successful Visual Pick results in a success result code. If a timeout was selected for the Visual Pick and there
was no object detected before the timeout, then timeout will be the result code. Lastly, if there hasn’t been a Visual Pick executed before
this node executes, the result code will be unknown. If the result of the last pick matches the selection, the child node, which is
initially labeled <empty>, will be executed.
This mode of the Visual Decide node can be used for creating more robust programs that handle error conditions. For example, the user may wish to perform a certain action if there was a timeout from a Visual Pick.
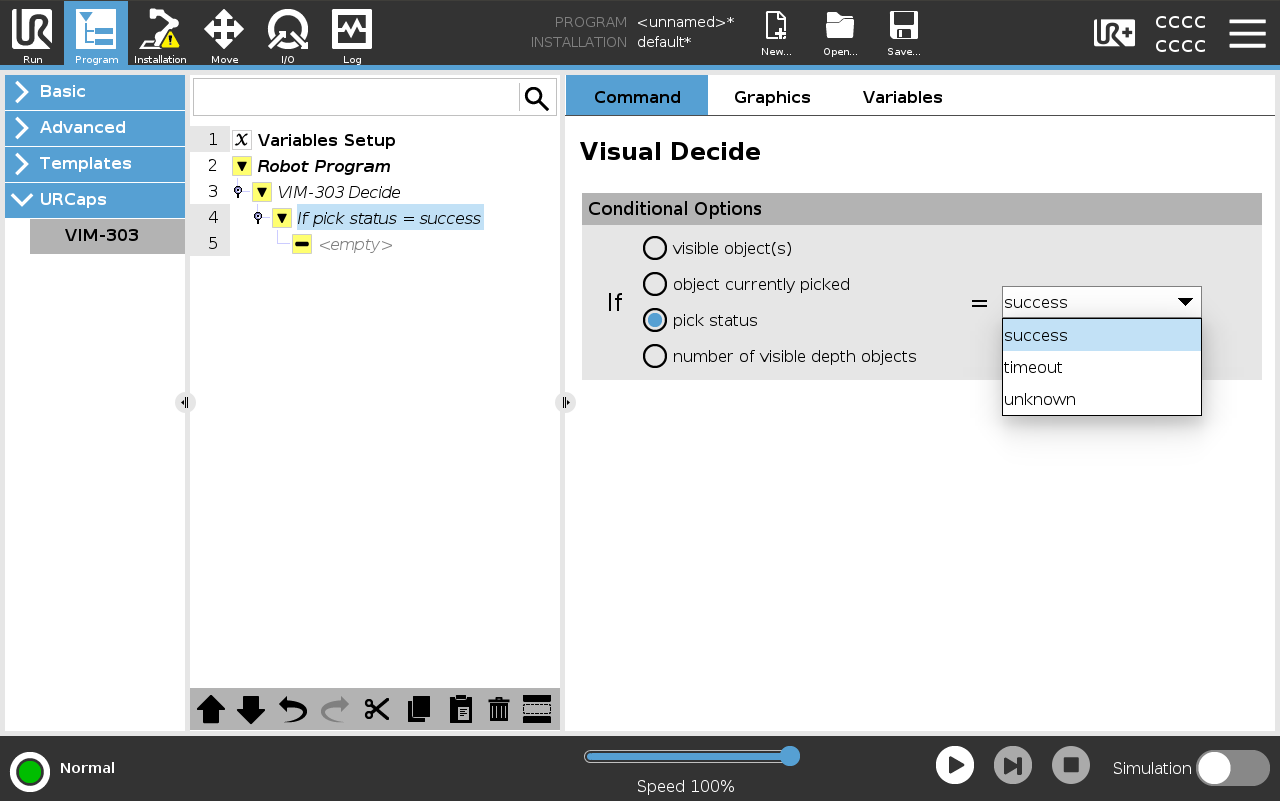
Figure 60: Visual Pick Status
Number of Visible Depth Objects
Figure 61 shows the last mode of operation of the Visual Decide node. It allows the number of visible objects to be compared. This mode
counts the total number of depth objects (trained and untrained) that are visible within the camera’s Field of View.
The number of objects can be compared to a value using a list of operators. If the condition is met, the child node, which is initially
labeled <empty>, will be executed.
This mode of the Visual Decide node can be used for checking if there are any objects in the field of view.
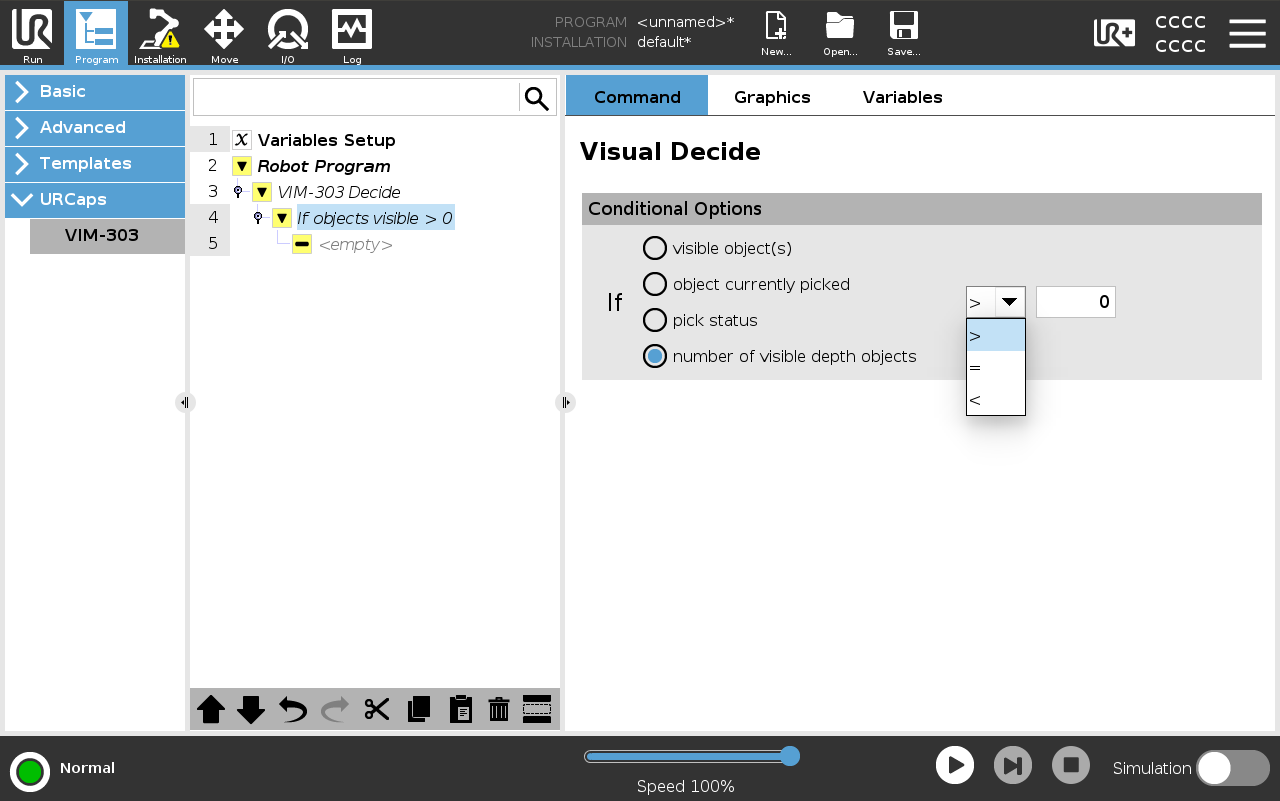
Figure 61: Number of Visible Objects