Live Image and Object Configuration
Press the UR+ icon in the top right corner to access the UR toolbar menu. Press the VIM-303 tab to access the camera’s live image menu (Figure 27). In this example, a box is visible in the field of view, but it has not been detected yet because it hasn’t been trained.
Pressing the UR+ button again will close the UR+ menu.
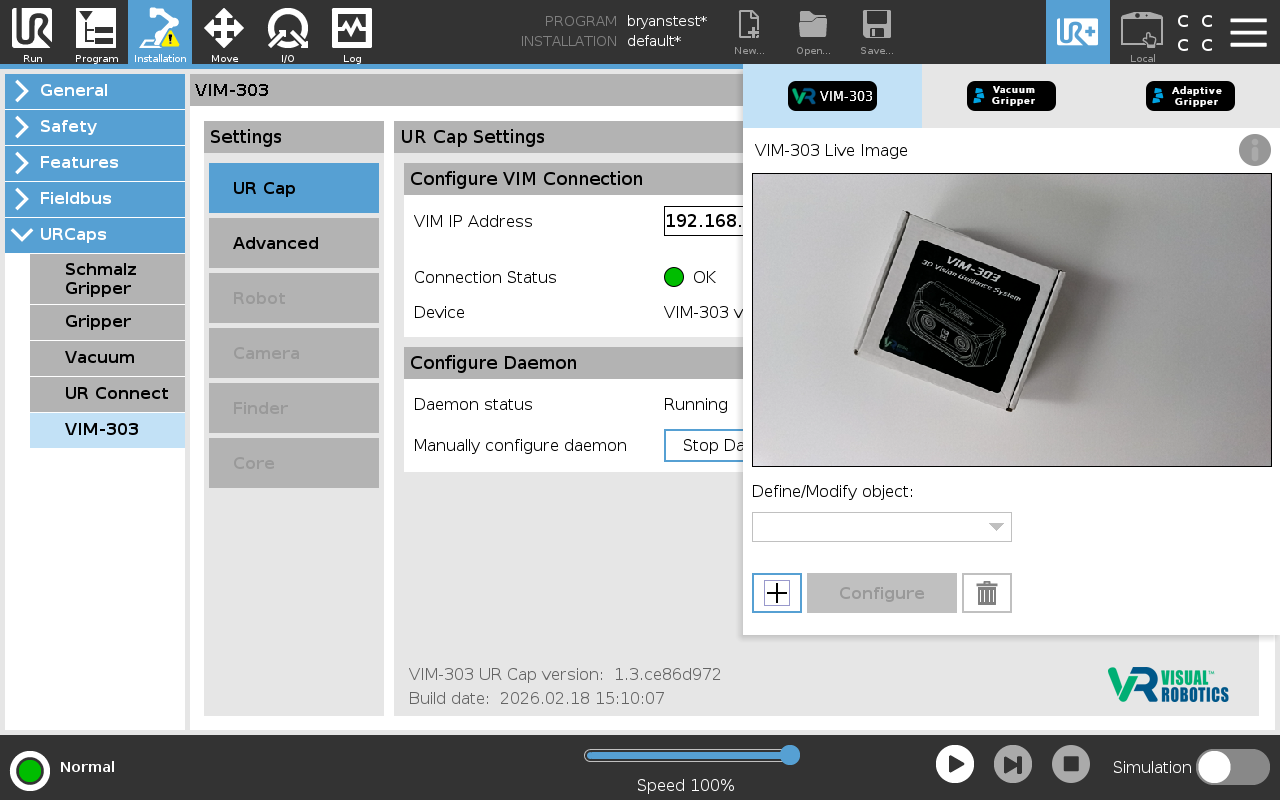
Figure 27: Live Image Menu
Live Image
The type of image displayed depends on what object is selected and its trained finder. More information on objects and finders can be found in the sections below. With a specific object selected, different types of images and annotations can be manually selected. This can be done using settings in the DEBUG_IMAGE module of the Advanced settings tab, as described in a further section of this manual, but please note that changing the selected object in the UR+ menu will in most cases revert changes made to these settings.
In Figure 28, the Depth Map is shown, which is colorized vs distance, with blue indicating the farthest distance and red indicating the nearest distance. The table surface is shown in green, with the box in yellow because it is closer to the camera. Also shown is the ROI (Region of Interest) as a large yellow box around the edge, indicating where objects will be detected.
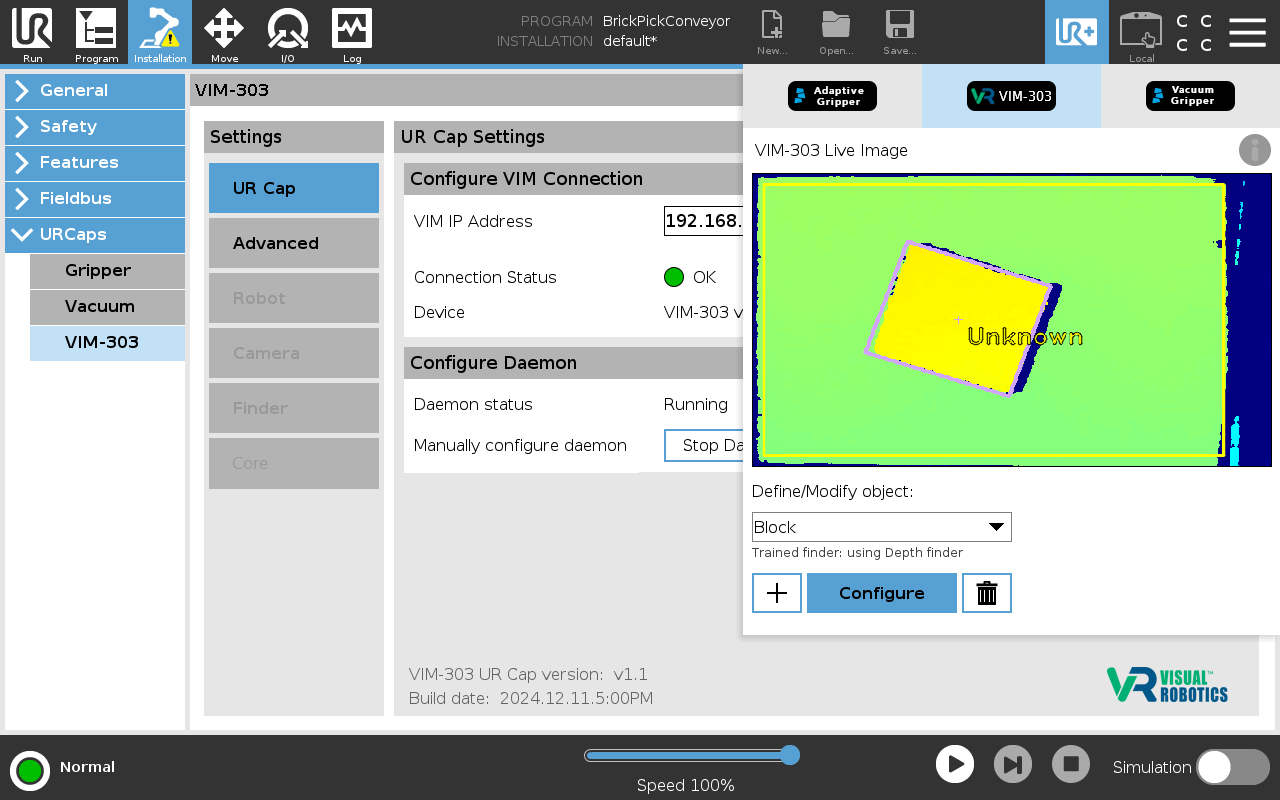
Figure 28: Depth Map
New Object Creation
New objects can be created by pressing the + button near the bottom of the UR+ live image menu (Figure 29). A keyboard lets you type the name of the object (Figure 30). Press Submit to accept the name.
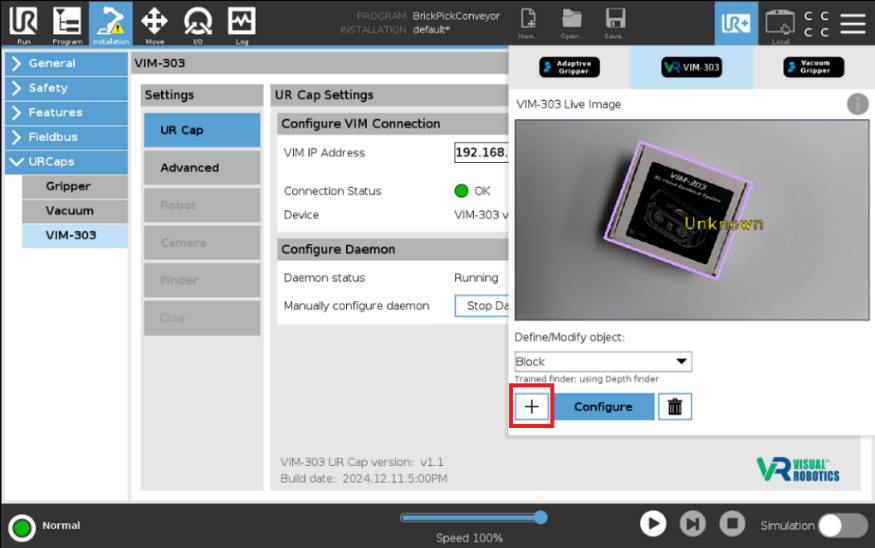
Figure 29: Defining a new object
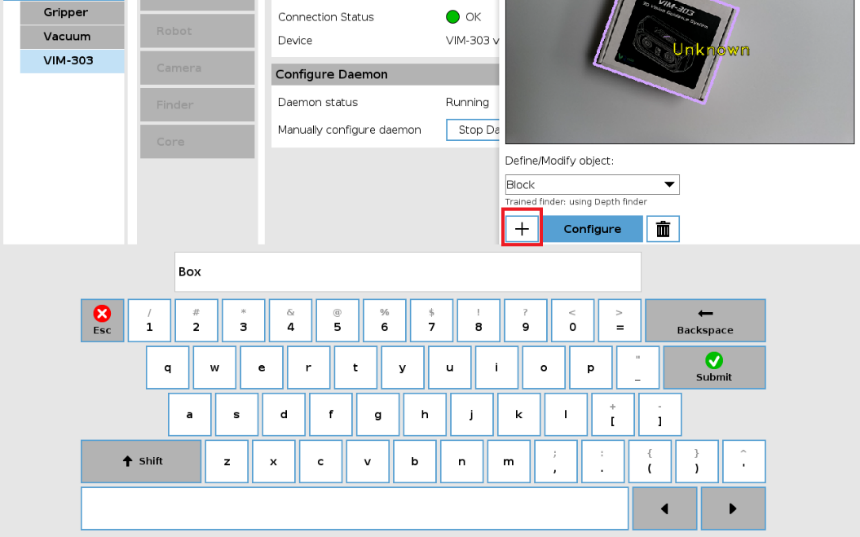
Figure 30: Naming a new object
A new dialog box called Object Editor will open to configure the object. To finish new object creation, objects must be trained with a finder in the Object Editor . Until the object is trained, the small text below the object selection box in the UR+ menu will say “No finder selected”. The training process is different for each finder and is explained in the sections below. Please note that if you begin to create a new object but don’t finish by training it, the object will be lost if you leave the Object Editor dialog.
Object Deletion
Objects can be deleted from the UR+ menu by selecting the object with the pull-down menu and pressing the trash can icon.