Installing UR Cap
UR Cap Software Installation
Follow these instructions to install the UR Cap software that enables the VIM-303 camera features within the Universal Robots PolyScope environment. The VIM-303 UR Cap supports only the Universal Robots e-series.
-
Your camera came with a USB Flash Drive with the UR Cap included. If you received a UR Cap update from Visual Robotics, copy it onto this or another Flash Drive. Insert Flash Drive into the pendant in the USB port on the top towards the right (Figure 1).
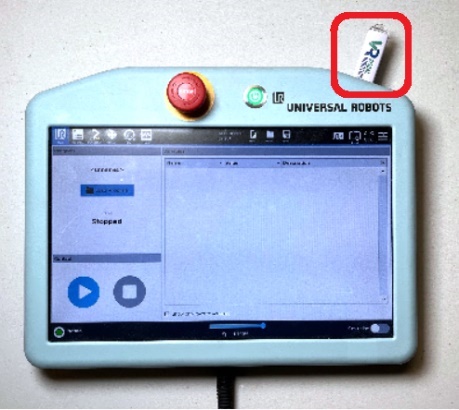
Figure 1: Flash Drive in pendant.script
-
Choose the hamburger menu in the upper right corner (Figure 2).
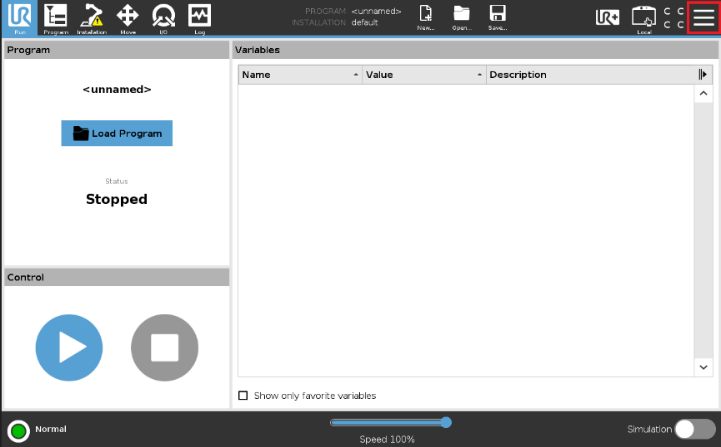
Figure 2: Hamburger menu
-
Choose 8 from menu (Figure 3).
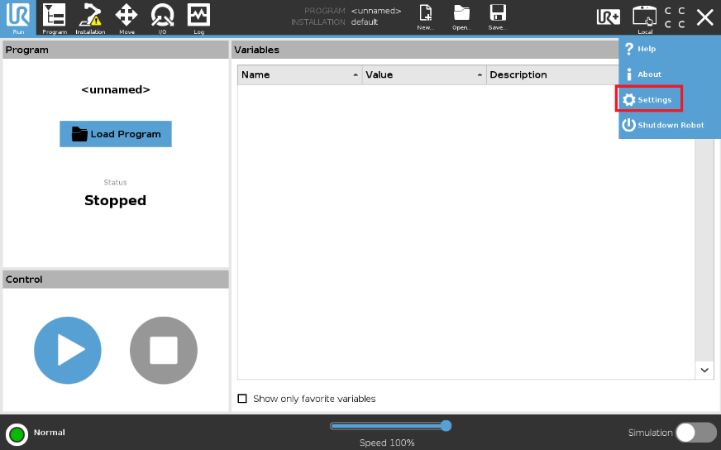
Figure 3: Settings
-
From the System menu on the left side, select UR Caps. Press the Plus (+) button to load a new UR Cap (Figure 4).
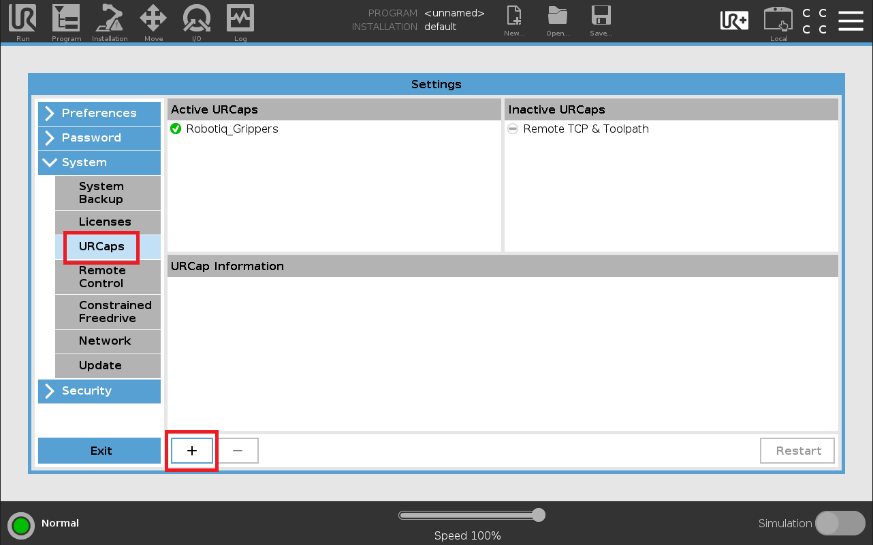
Figure 4: UR Caps and Plus button
-
Choose usbdisk (Figure 5).
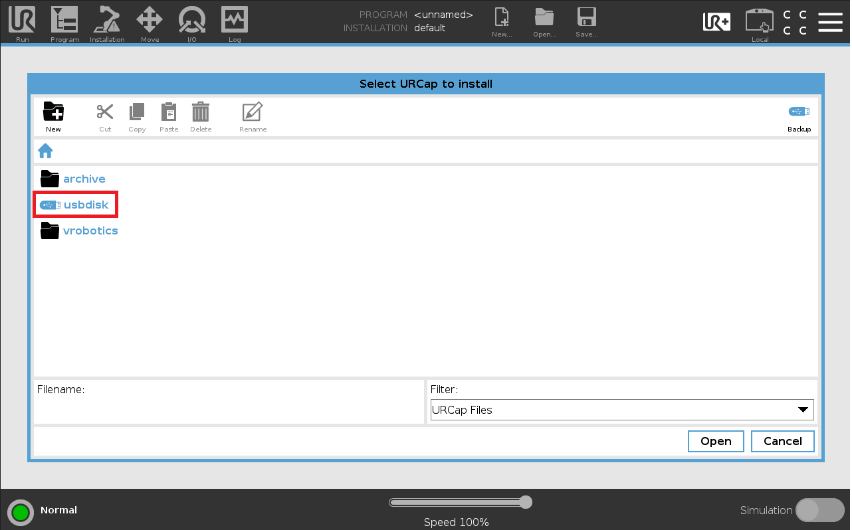
Figure 5: Choose USB disk
-
Select the quickpick UR Cap and choose Open (Figure 6).
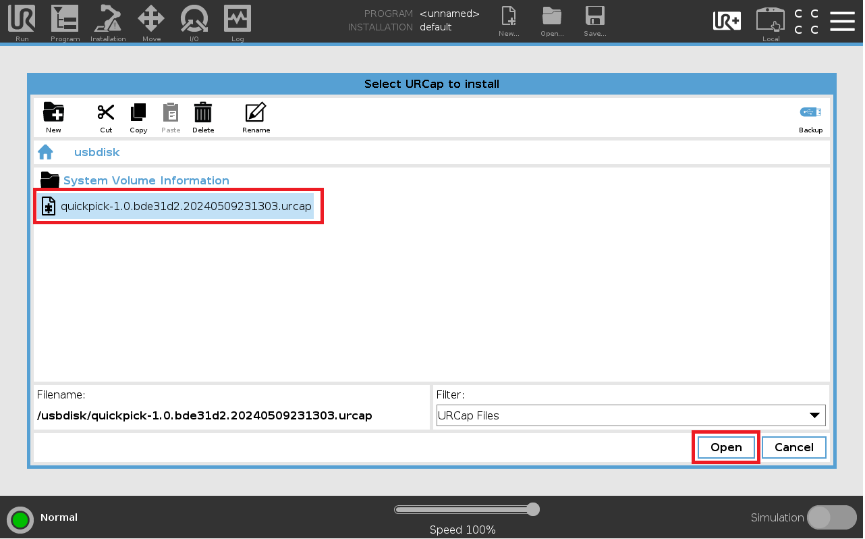
Figure 6: Select UR Cap
-
Restart the robot to install the UR Cap (Figure 7). Remove the Flash drive after pressing restart.
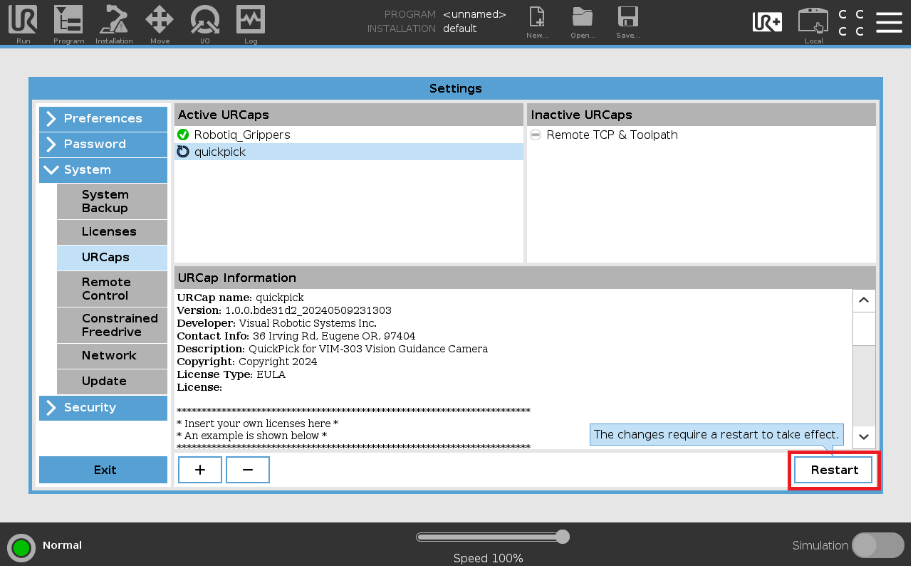
Figure 7: Restart robot
-
After rebooting, return to the UR Caps menu to confirm the installation of the quickpick UR Cap (Figure 8). Then exit the Settings menu.
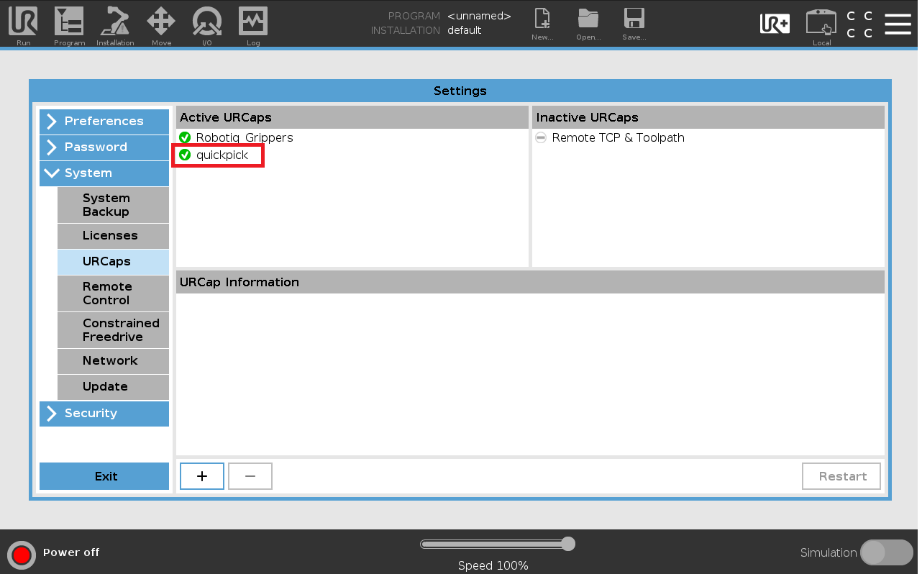
Figure 8: Verifying that UR Cap is installed
-
Choose the Installation menu and choose UR Caps from the left side (Figure 9).
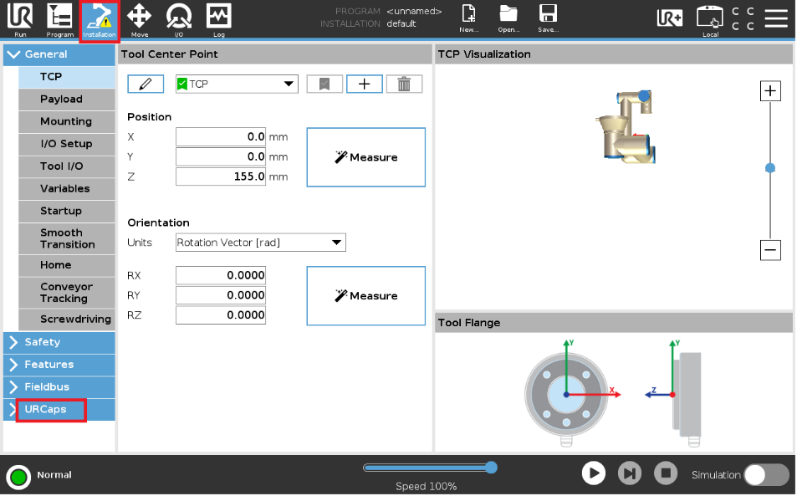
Figure 9: UR Cap installation menu
-
Choose VIM-303 from the left menu (Figure 10). The VIM-303 configuration page appears. Click into the VIM IP Address field and set this to 192.168.1.47 (or the camera’s address if modified).
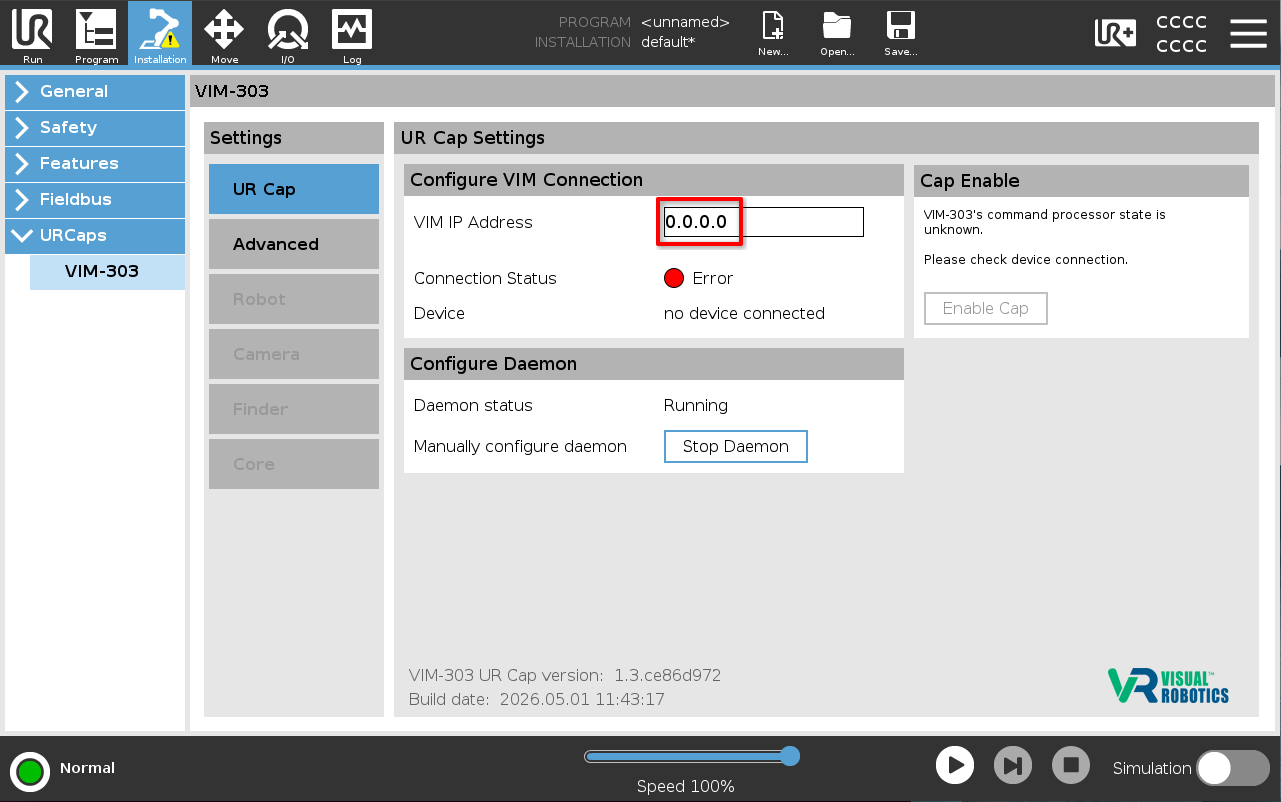
Figure 10: Camera IP Address configuration
-
Confirm that the status indicator turns green (Figure 11). The camera will report its type (VIM-303) and its hostname (vrobotics87b9 in this example). The UR Cap is now connected to the camera.
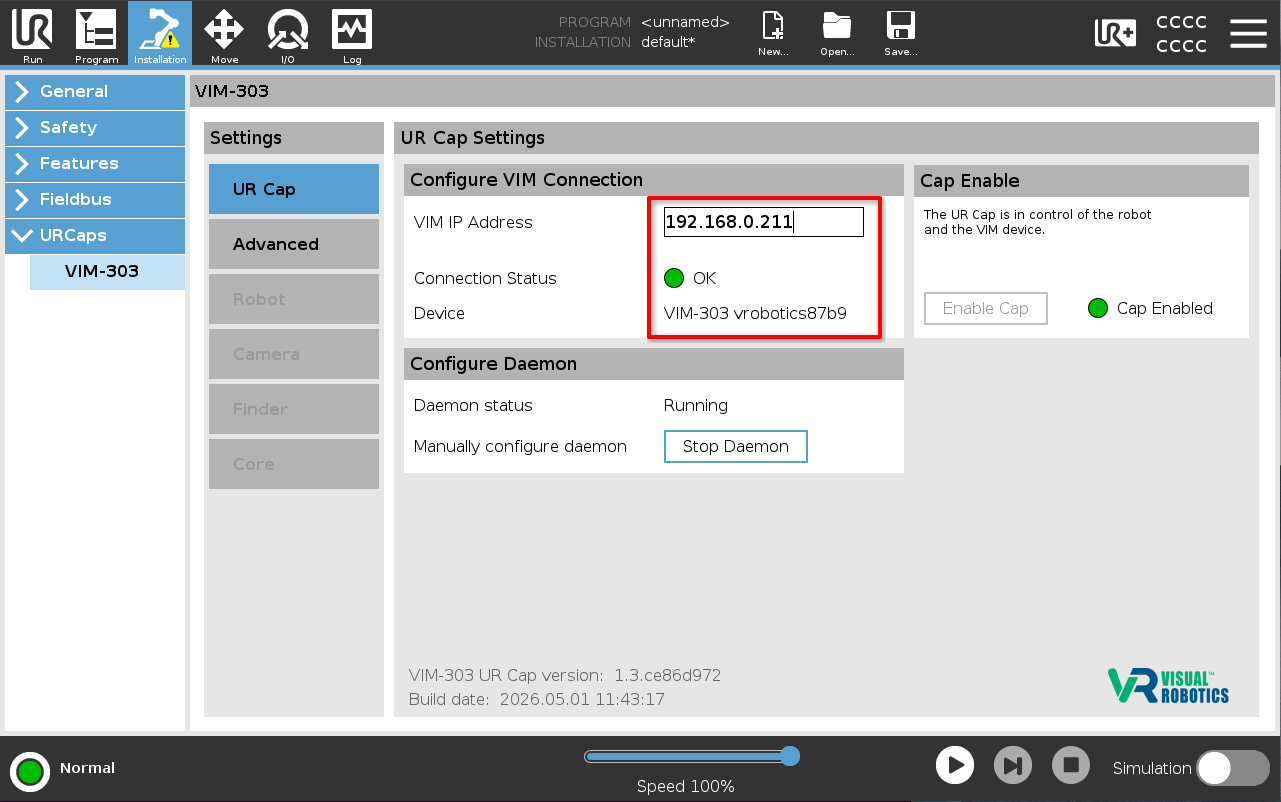
Figure 11: Successful connection to VIM-303 camera
Required Permissions Changes
Small changes are required to the access settings on your Universal Robots e-series robot in order for the VIM-303 to communicate correctly.
To make these changes, follow the steps described in the Permissions for UR Manual. Once these steps are completed, continue to the steps below.
Next Steps
The VIM-303 camera is factory configured to the following parameters:
- Camera IP: 192.168.1.47
- Robot IP: 192.168.1.50
- Gripper: Visual Robotics Single Suction Gripper
If this matches your configuration, you can skip to the section Live Image and Object Configuration to learn how to create objects using either the Depth or Template Finder.
After creating an object, you can follow steps in the PolyScope Programming Examples section to learn how to perform a simple visual pick-and-place.
If desiring to change camera, robot, and gripper settings from defaults, follow steps in the section Configuring the Camera to Communicate with the Robot.