Depth Object Configuration
Depth objects are trained based on their dimensions.
Make sure you’ve created a new object as described above. Once you see the Object Editor dialog you’ll be given the choice of a finder for your object. Choose the Depth tab and click Select Depth Finder to begin the configuration and training process (Figure 31).
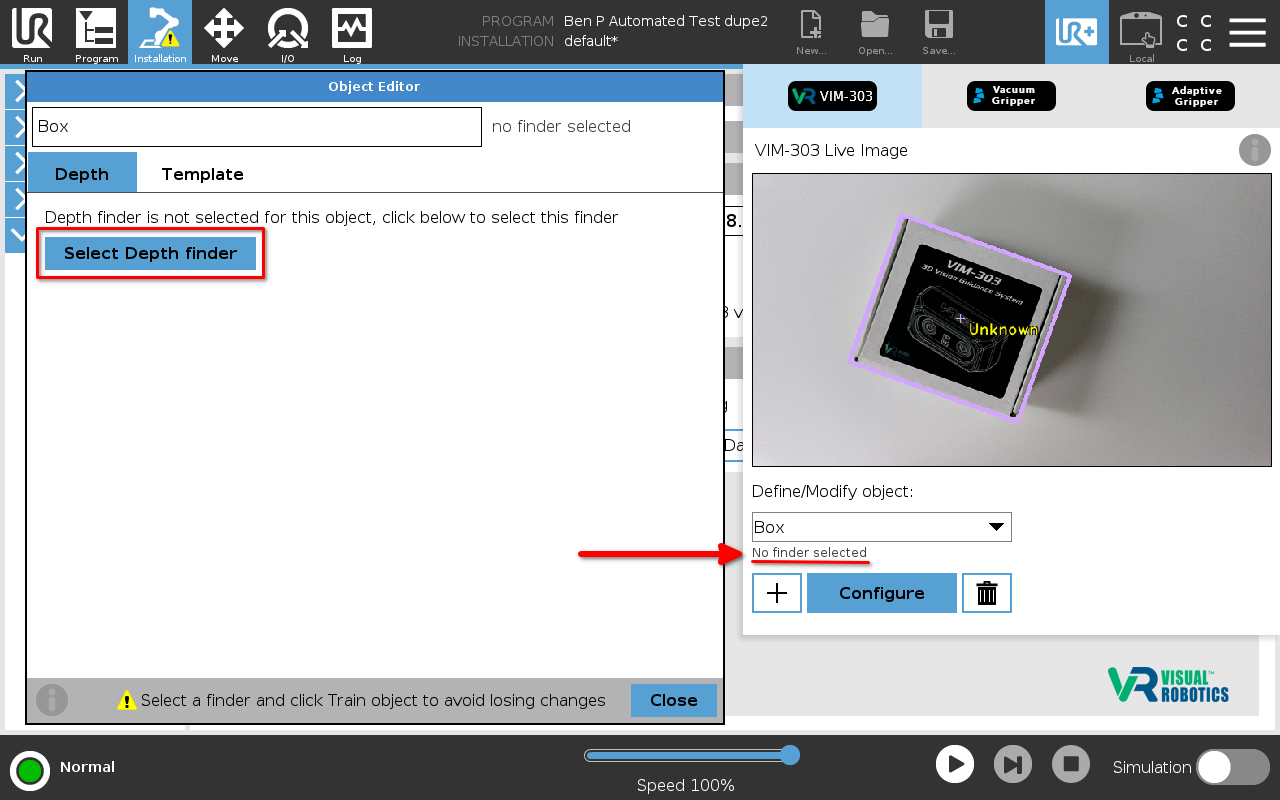
Figure 31: Select Depth Finder
As shown in Figure 32, adjust the Work Surface Depth to match the distance from the surface the object is sitting on (table) to the front surface of the camera, either with the slider or buttons, or select Auto if the work surface covers most of the field of view . The camera will compute the work surface depth as the median depth of the depth image. Objects will be outlined in purple when they are detected above the work surface.
The Depth Finder has many parameters that can be adjusted in Advanced settings within the Installation, under the DEPTH_FINDER module.
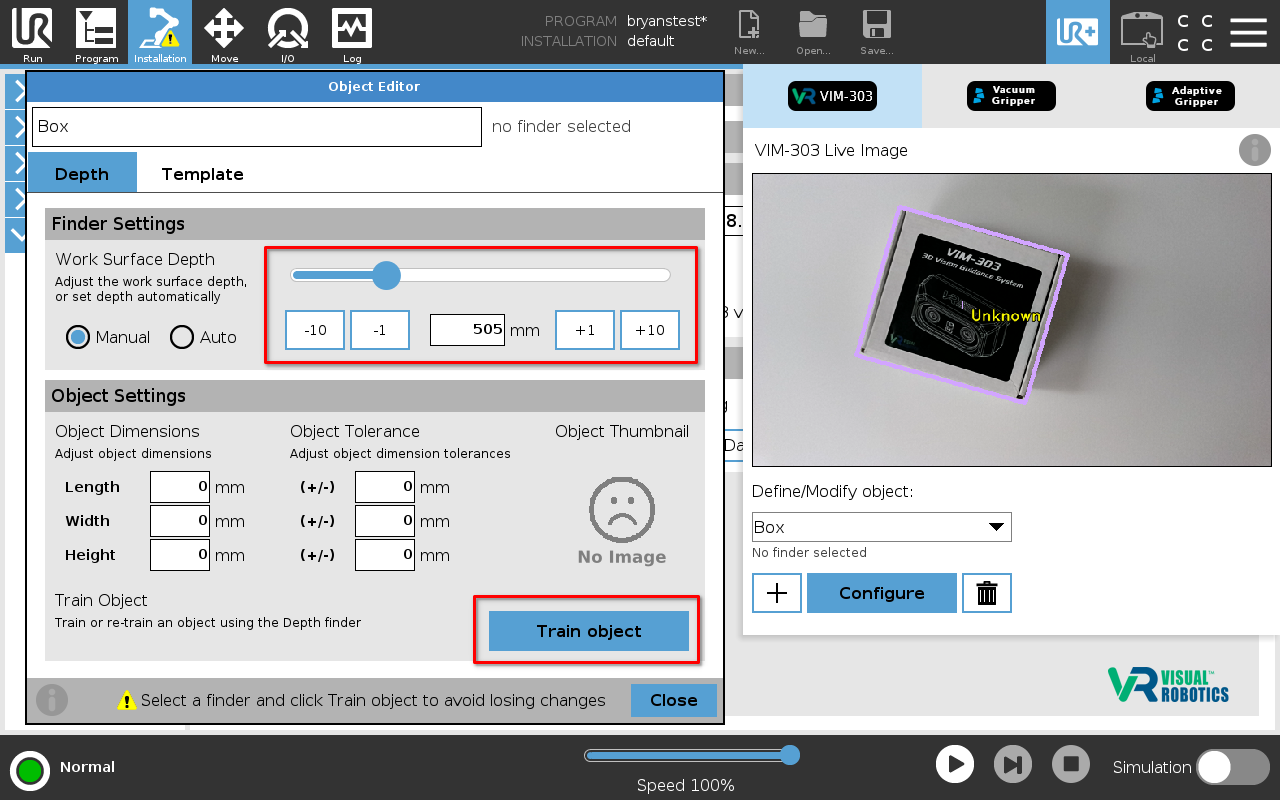
Figure 32: Object Editor
With a single object in view, press Train object. The camera will measure the dimensions and capture a thumbnail image for reference (Figure 33). Press Close to close the Object Editor once a new object has been trained.
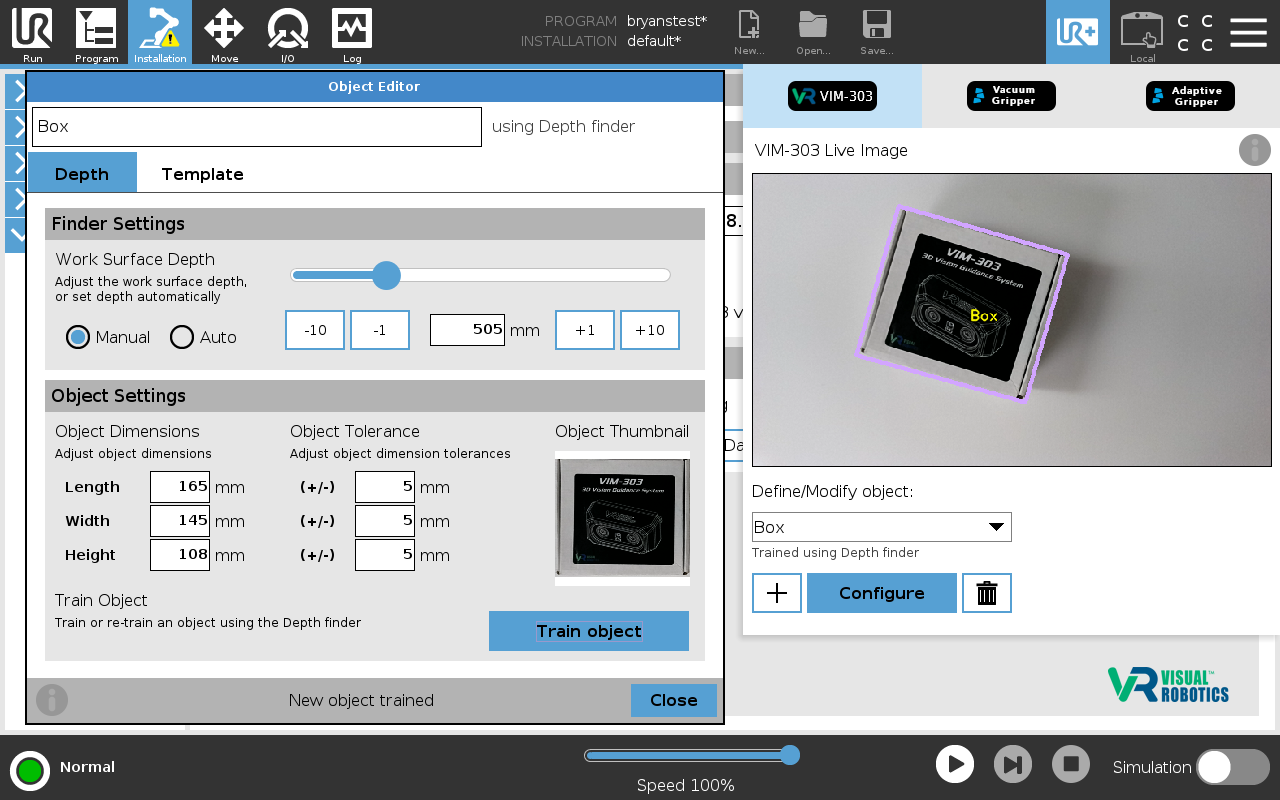
Figure 33: Trained Object
Previously trained objects can be re-trained by selecting the object from the pulldown menu in the UR+ menu (Figure 34). Press Configure to pull up the Object Editor (Figure 35). Re-train the object as described above – the process is the same.
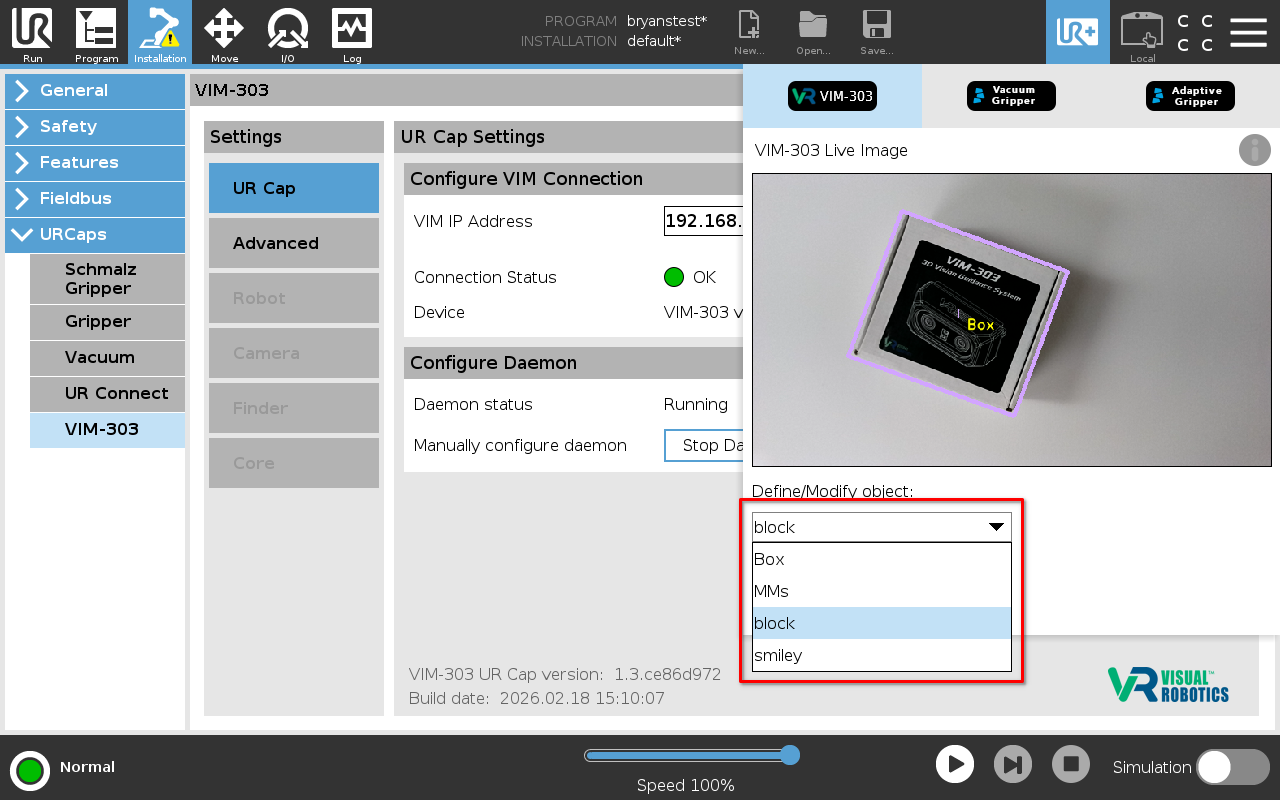
Figure 34: Selecting an Object
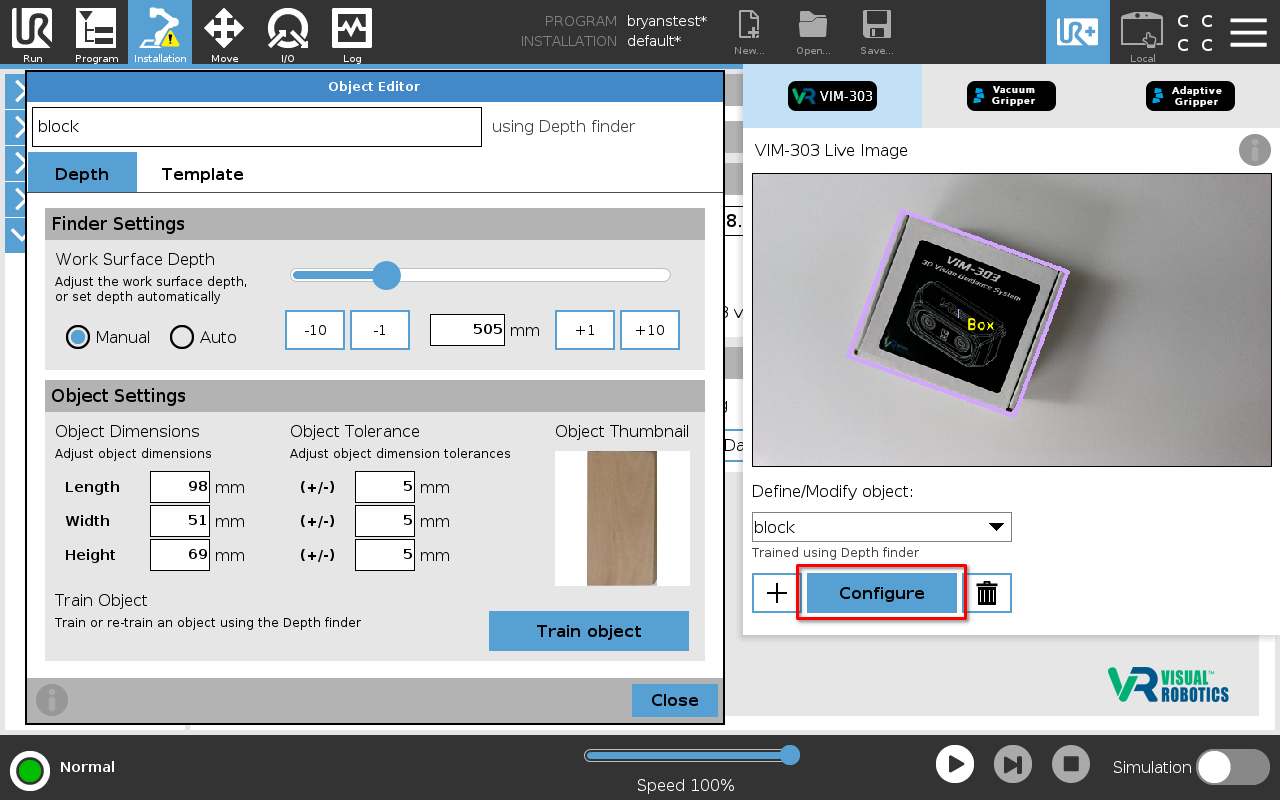
Figure 35: Object Editor with a trained object