
Configuring the Robot
Powering up the Robot
Follow steps in Figures 47 – 50 to power up the robot. If the robot is power cycled, follow the steps of Figures 47 – 50 to allow the robot and camera to communicate.
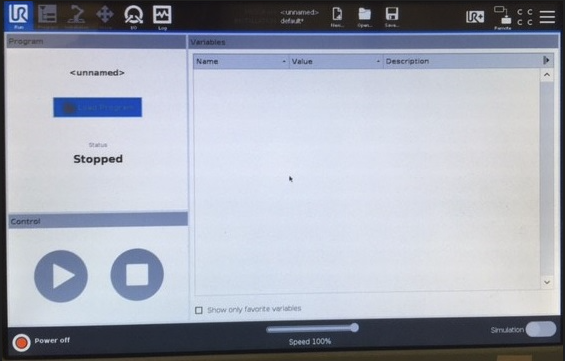
Figure 47: Press Red "Power Off" Button
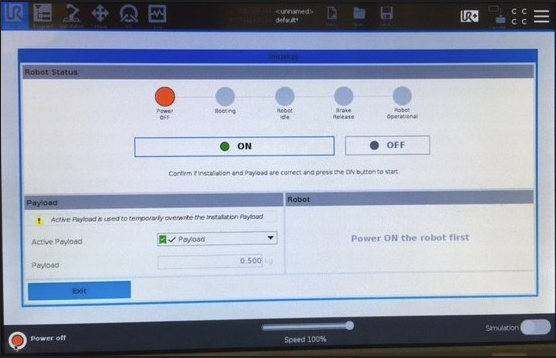
Figure 48: Press "ON"
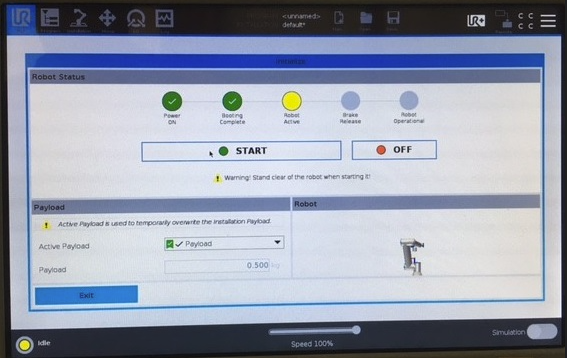
Figure 49: Press "START"
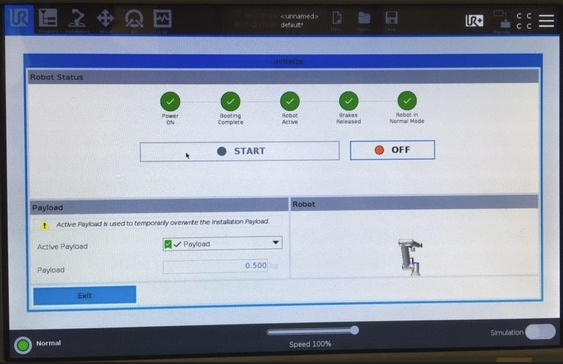
Figure 50: Press "Exit"
Local vs Remote Mode
The e-Series robots allow the operator to operate the robot via the pendant when the robot is in Local Mode. The robot can be controlled by another system (such as the VIM-303 camera via QuickPick) when it is in Remote Mode. Figure 51 shows the icon to press to change between Local and Remote modes.
Set the pendant to Local Mode.
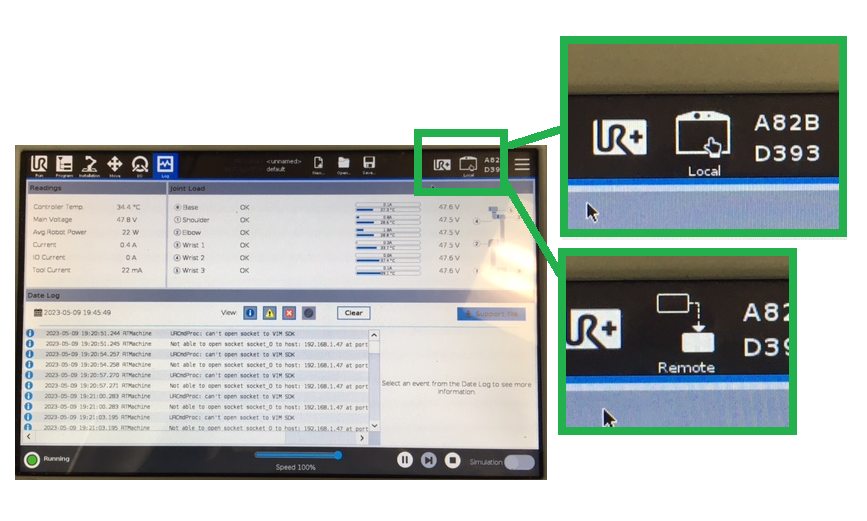
Figure 51: Local vs Remote Mode
Configuring the Robot’s Network IP Address
The VIM-303 camera communicates with the robot over Ethernet. To configure the robot’s network IP address, the robot must be in Local mode. Configure the robot’s network address by following the steps in Figures 52 – 55 (this only needs to be done once as part of initial setup).
The VIM-303 camera is configured by default to communicate with a robot at the address 192.168.1.50, so we will set the robot to this address here.
Shown in Figure 52, press the hamburger menu in the upper right corner.
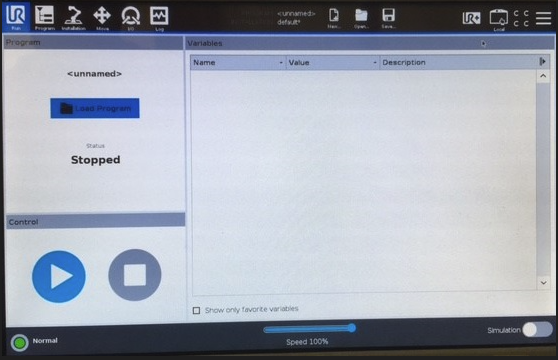
Figure 52: Home page with hamburger menu in upper right corner
Shown in Figure 53, click the Settings gear cog menu option
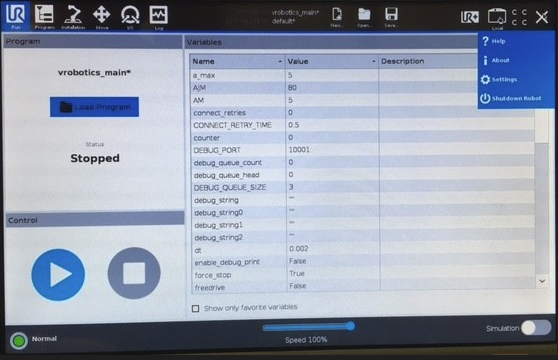
Figure 53: Press Settings gear
Shown in Figure 54, open the System tab in the panel on the left
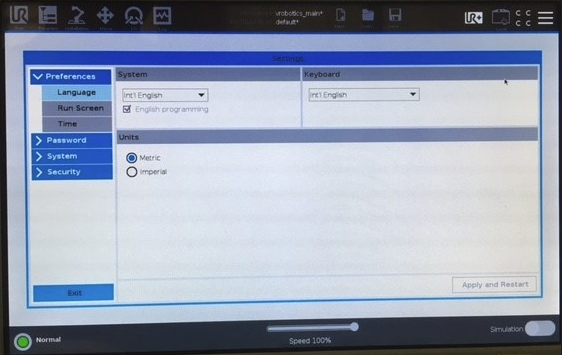
Figure 54: Settings with left panel with System tab
Shown in Figure 55, press the Network sub tab to open the Network page. Set the robot to a static network address to 192.168.1.50. Press Apply when finished.
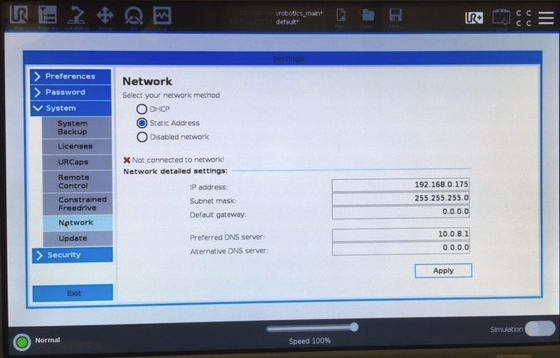
Figure 55: Enter Static Address parameters and press "Apply”
Setting Robot TCP
Configure the robot TCP for the Visual Robotics single suction gripper (Figure 56).
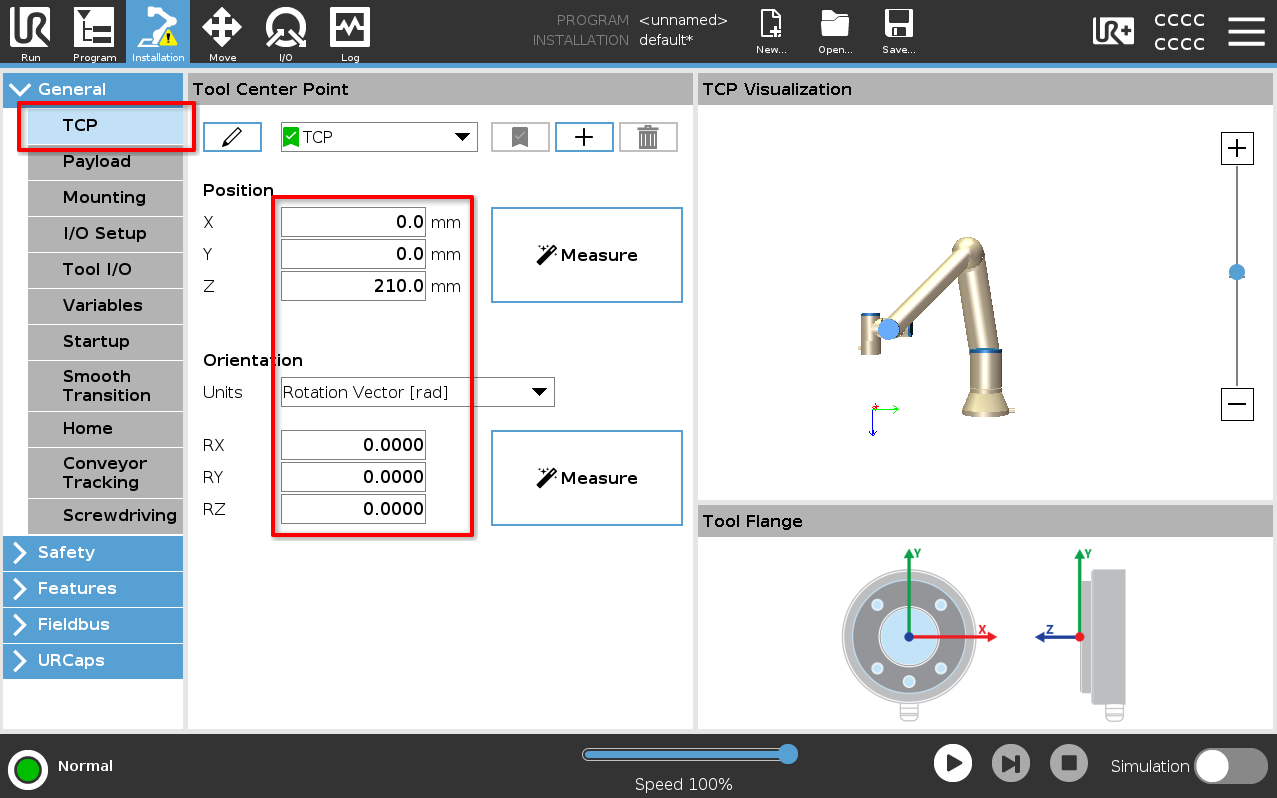
Figure 56: Set robot's TCP for Visual Robotics Single Suction Gripper
Next Steps
The robot, gripper, and VIM-303 camera are now configured. See the UR Cap Manual to learn how to create tasks using the UR Cap. See the QuickPick User Interface manual to learn how to create tasks using the QuickPick 303 web interface.