Configure Permissions
Set Access Settings
Go to the Hamburger Menu and select Settings and General. To allow any IP address to communicate with the robot, clear Restrict inbound network access to this subnet as shown in Figure 1. Otherwise, select the subnet where the robot and camera are located as shown in Figure 2.
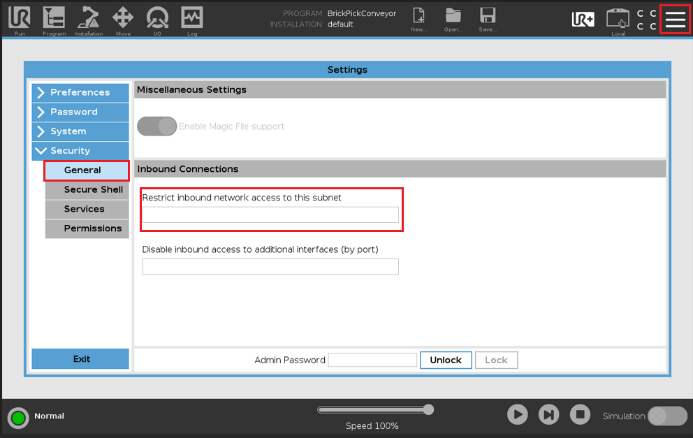
Figure 1: Unrestricted network access to robot
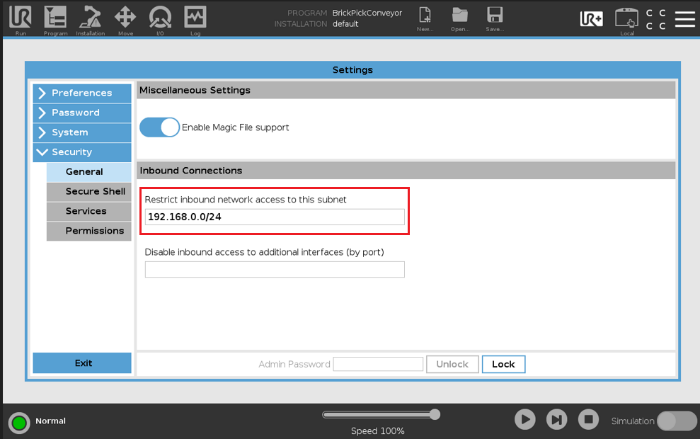
Figure 2: Network access within same subnet
Set SSH Settings
In the Secure Shell menu, ensure that Enable SSH Access and Allow Port Forwarding is checked (Figure 3).
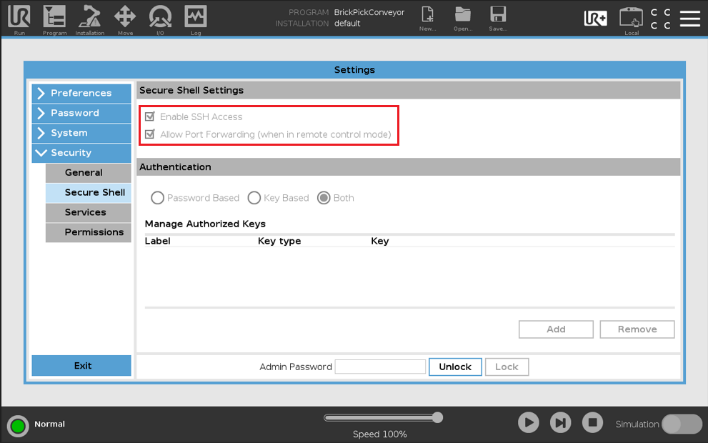
Figure 3: SSH access
Enable Services
In the Services menu, ensure that the services listed in Figure 4 are enabled: Dashboard Server, Primary Client Interface, Secondary Client Interface, Real-Time Client Interface, Real-Time Data Exchange (RTDE), Interpreter Mode socket.
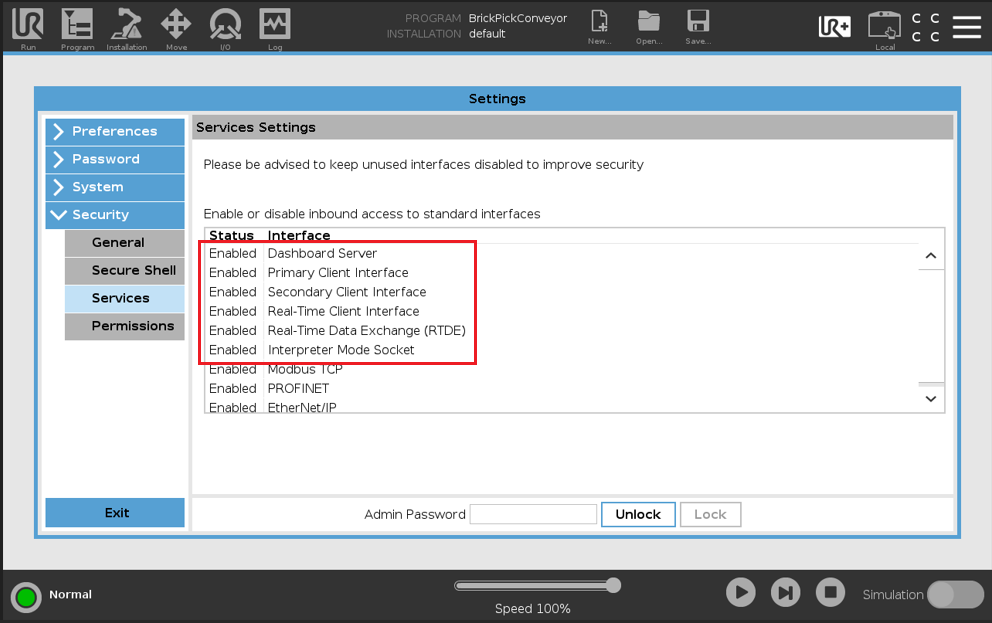
Figure 4: Required services from the robot
Enabling UR Cap
The VIM-303 UR Cap needs to be enabled and in control of the robot. This tells the VIM-303 to load the command_processor.script to allow it to control the robot. It also defines the vim303 variable, which is the XML RPC proxy to the camera (Figure 5).
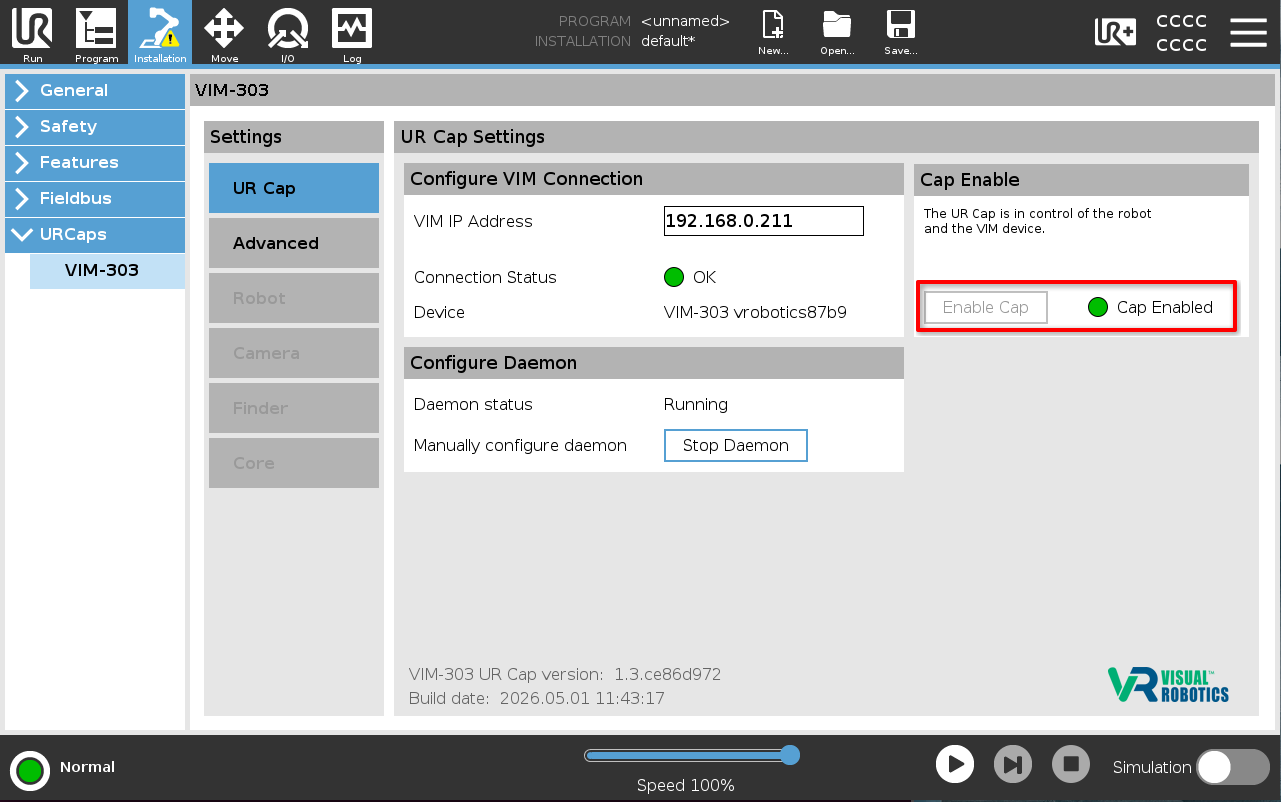
Figure 5: UR Cap Enabled
Admin Password
The default admin password of Universal Robots is easybot. This is used by the camera to use the secure shell command SSH to copy the command_processor.script file to the robot. If the robot’s admin password has been changed from default, enter the admin password in the Advanced Settings tab in the ROBOT module with the UR_ROOT_PASSWORD setting (Figure 6).
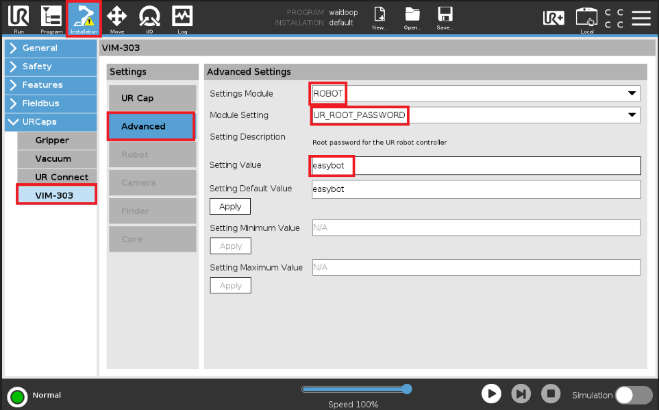
Figure 6: Change robot’s admin password
Reinitialize camera’s robot driver
If changes are made to the robot’s security settings or password, the camera’s robot driver will need to be restarted in order for it to connect to the robot properly and copy the command_processor.script to the robot. Figure 7 shows how to set the REINIT setting to 1 in the ROBOT module.
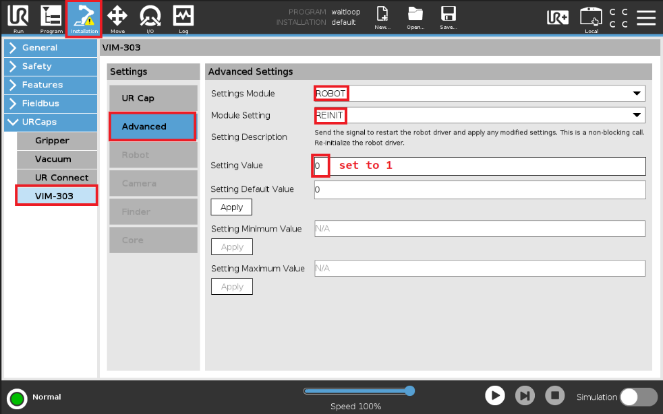
Figure 7: Reinitialize camera’s robot driver
Verify Proper Operation
The command_processor.script file should be on the robot. From the Program tab, choose Open to get to the Load Program menu. The file should be located in the directory. Don’t open it, just verify that it exists (Figure 8).
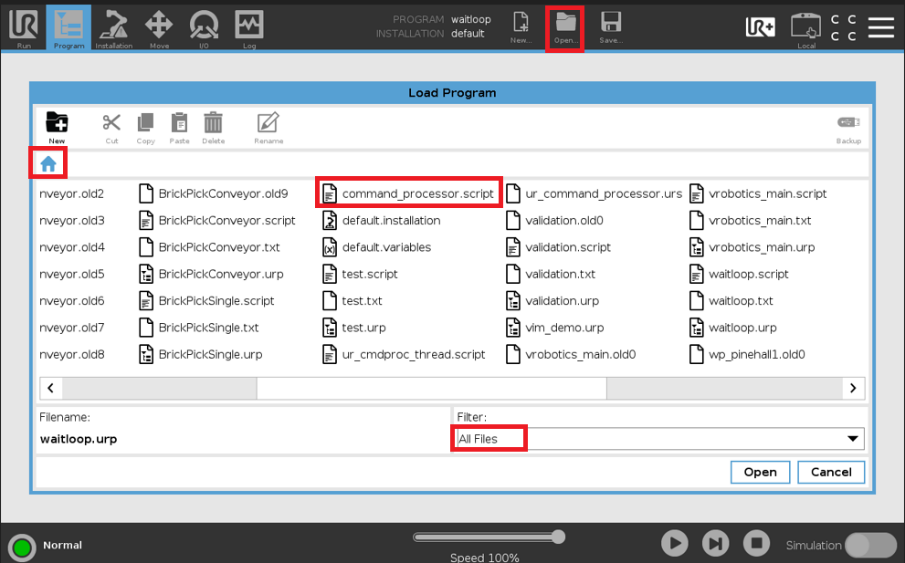
Figure 8: Verify existence of command_processor.script on robot
The command_processor.script is executed whenever a PolyScope program is executed. This can be verified by creating a simple Wait Loop program (Figure 9).
The camera hosts a web interface, QuickPick-303, that can be used to determine if the camera is properly connected to the robot. When the PolyScope program is running, the robot icon from QuickPick-303 should be green (Figure 10). When the program is stopped, the icon will be yellow.
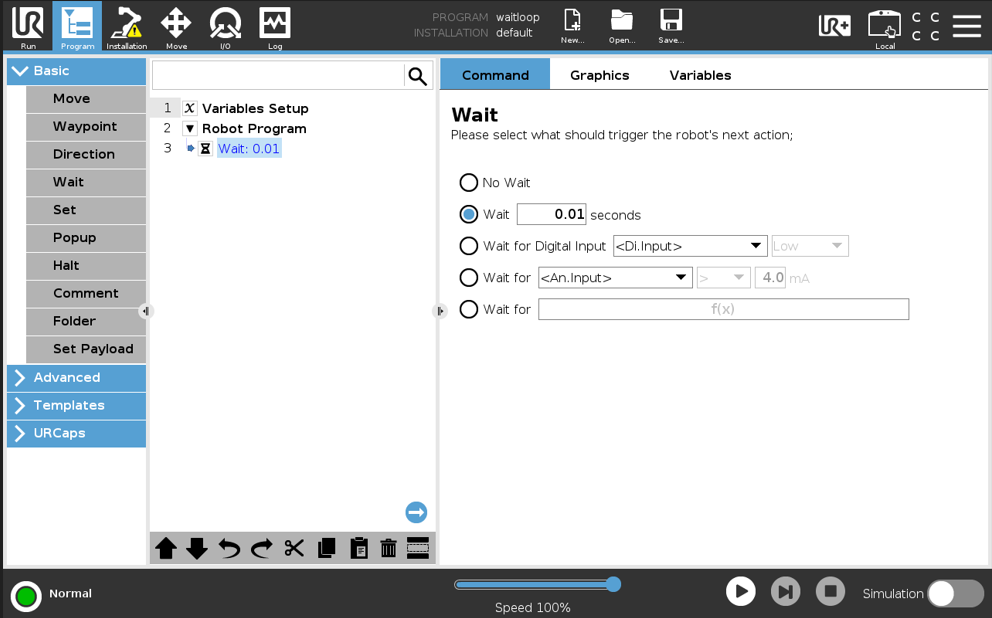
Figure 9: Simple Wait Loop program to test for the command processor running
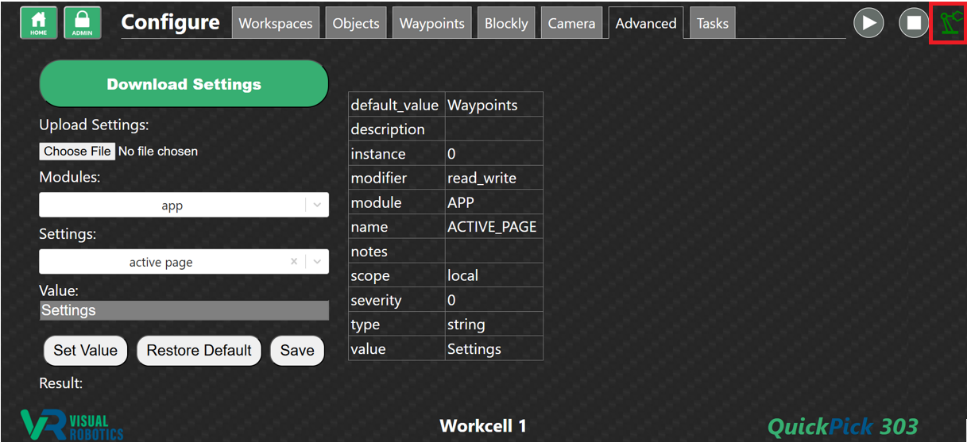
Figure 10: QuickPick with green status icon
Error Condition
If the command_processor.script can’t be found on the robot, or the UR Cap enable button is not pressed, when a PolyScope program is executed that includes a VIM-303 node, such as Visual Pick, the error shown in Figure 11 will occur. If this occurs, follow the instructions in this document to resolve the error.
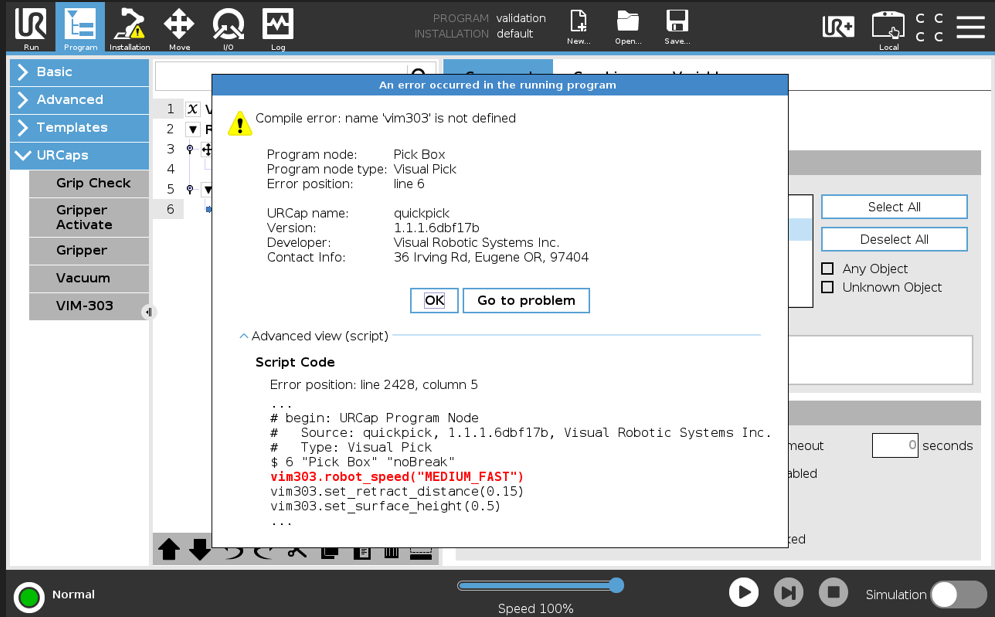
Figure 11: Error due to no command_processor.script